Manual
Georeference Widget
Overview
Optimize your cartographic workflows with our advanced georeferencing solution for ArcGIS Experience Builder. This widget allows you to align and position images and pdf files with millimeter precision using ground control points (GCPs), geometric transformations, and direct coordinate input. Designed for professionals who need to integrate historical maps, floor plans, or raw aerial imagery directly into their web applications, ensuring an exact match with their real geographic base.
Getting Started
Installation
To install an Experience Builder widget, follow the instructions at: https://enterprise.arcgis.com/en/portal/10.5/use/add-custom-widgets.htm
Configuration
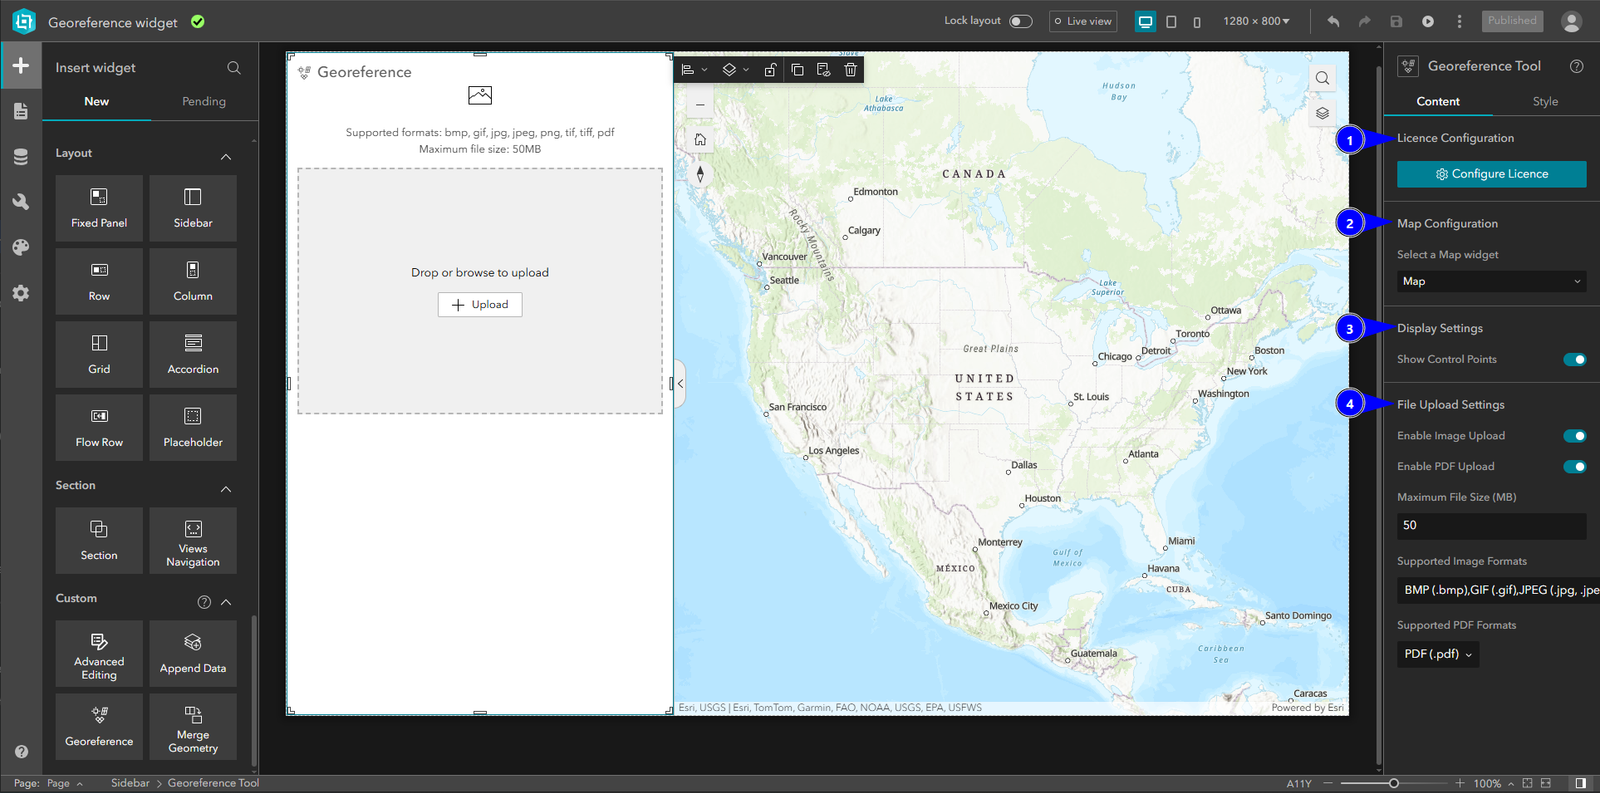
- Licence Configuration
- Map Configuration
- Display Settings
- File Upload Settings
License Configuration
To activate the widget license:
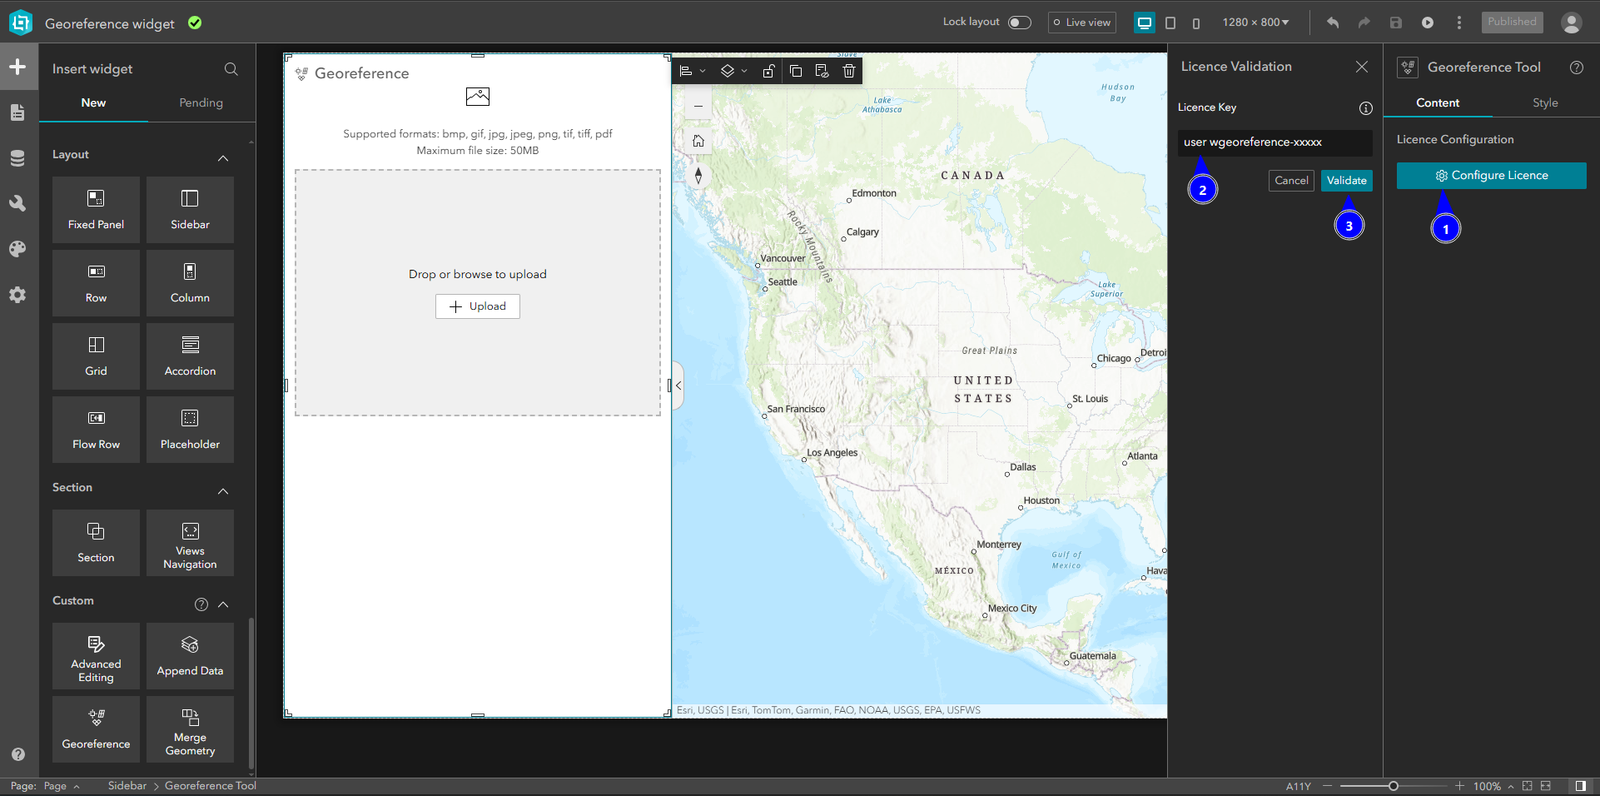
- In the right panel, click Configure Licence.
- Enter your license key in the input field.
- Click Validate.
Once validated, the widget is fully functional.
Map Configuration
Allows you to select the map the tool will interact with.
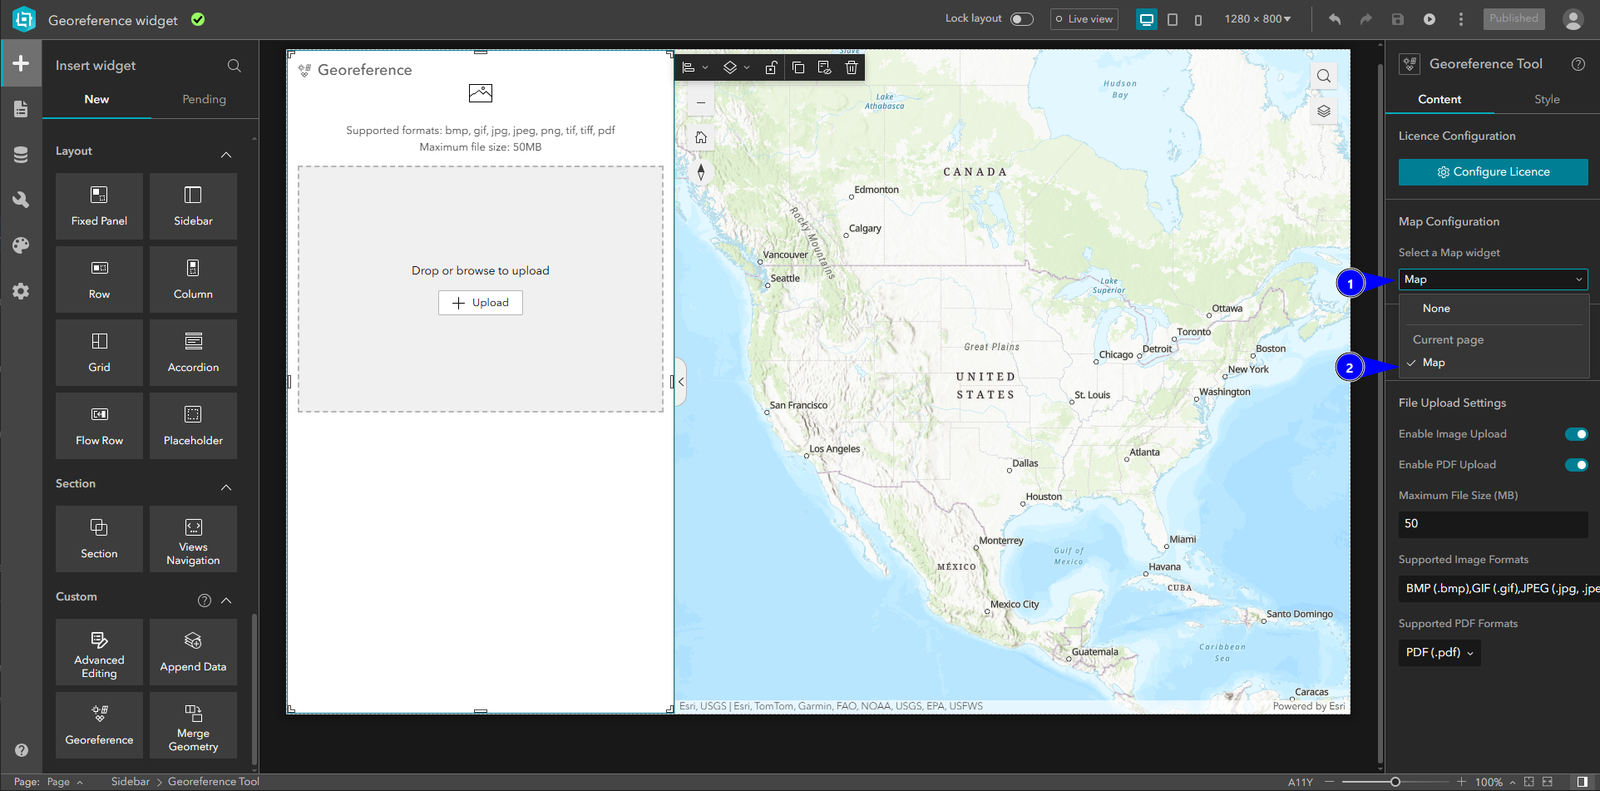
In Map Configuration, open the dropdown (1) and choose the map (2) to use with this widget.
Display Settings
Allows you to show or hide certain options
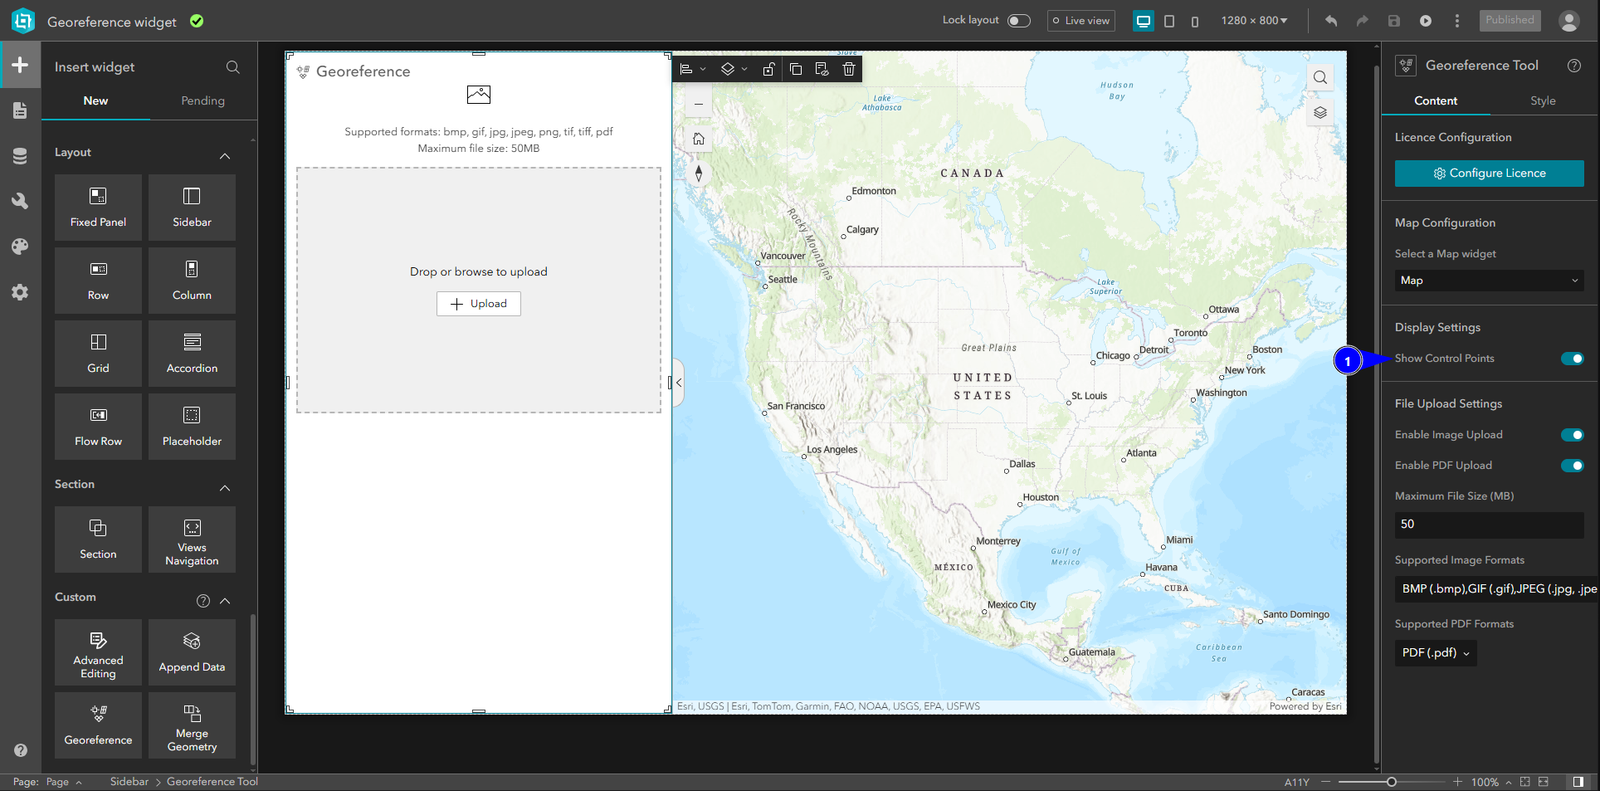
In Display Settings, enable or disbale (1) the Show control points
File Upload Settings
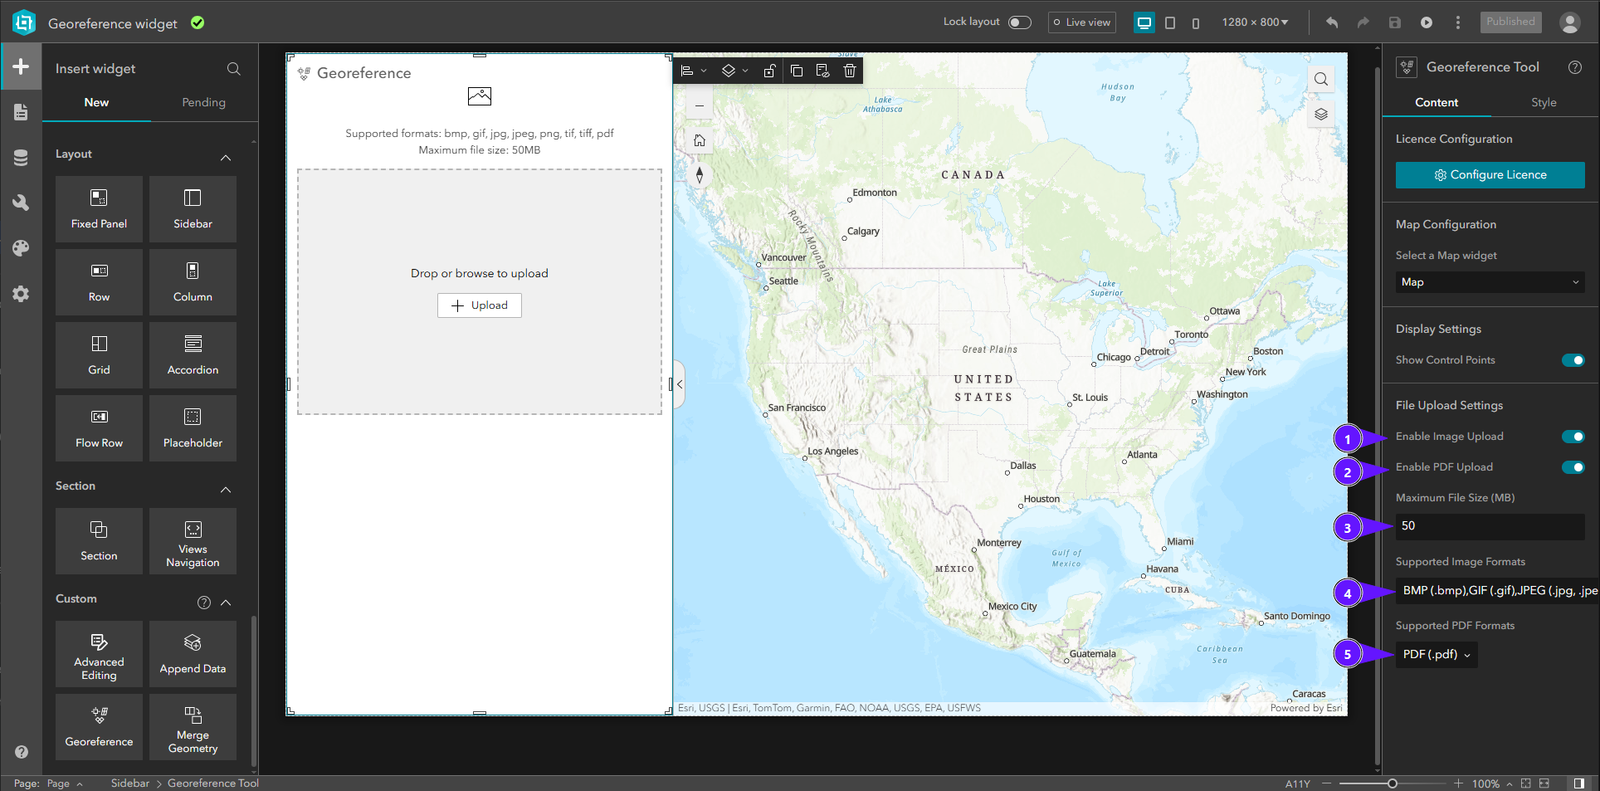
In File upload settings
(1) To enable image upload (2) To enable PDF upload (3) To set a file size limit in MB. (4) To select the image file formats accepted for upload. (5) To select the pdf file formats accepted for upload.
Usage
File Upload
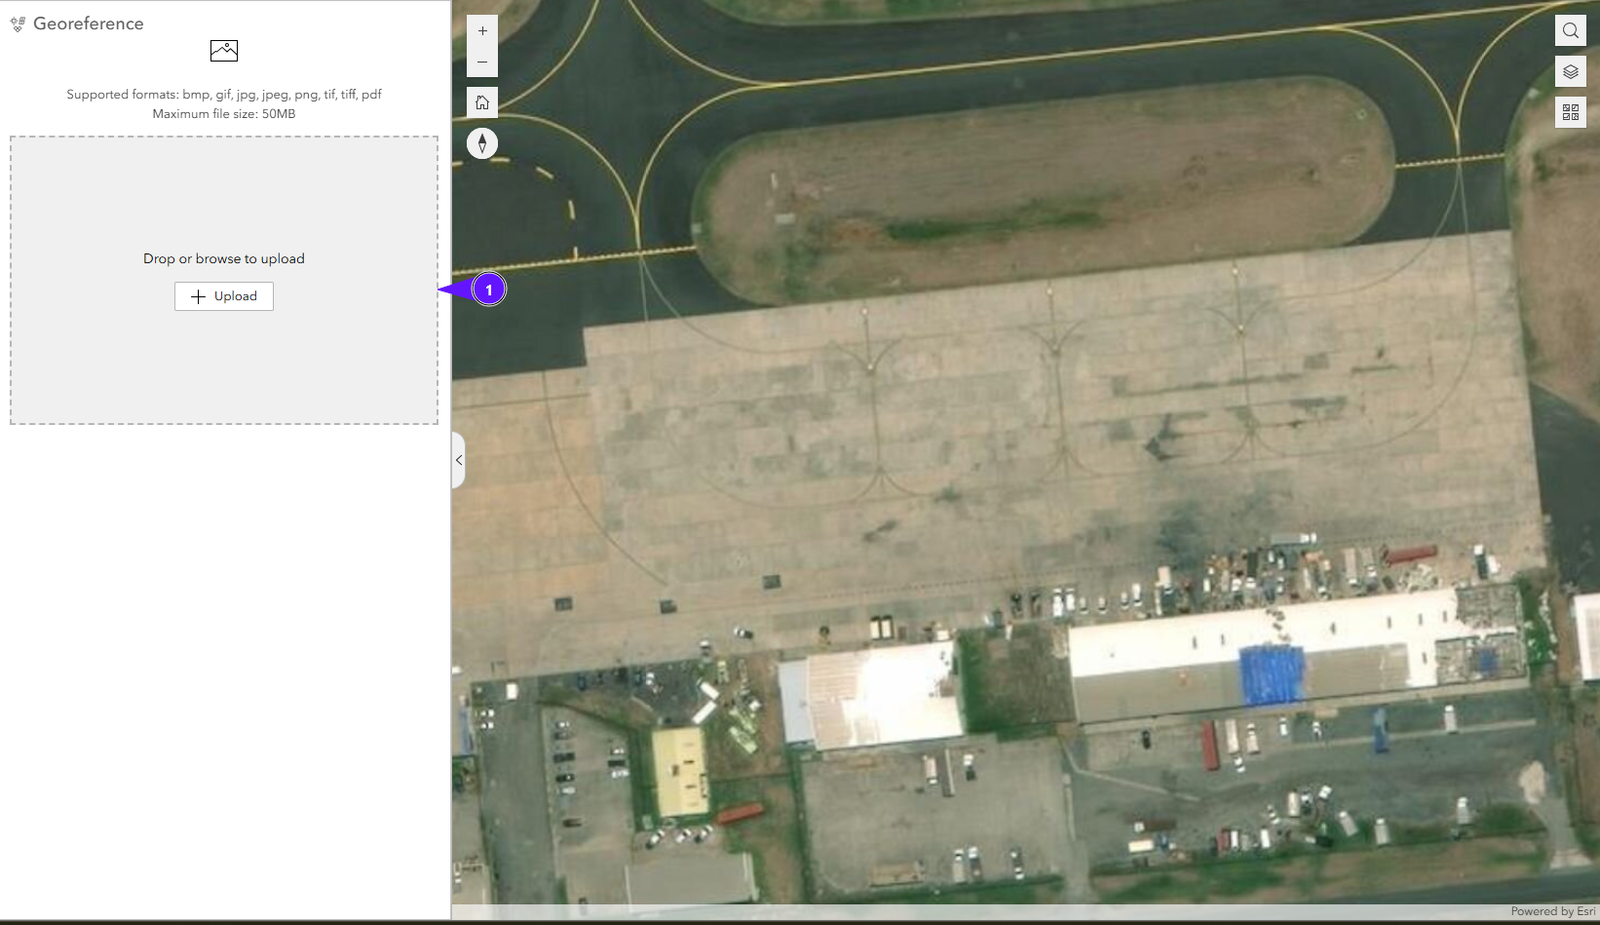
This screen shows the section that allows importing the input file.
- Only files with image or PDF formats previously enabled in the configuration are allowed to be uploaded.
Georeferencing Toolbar
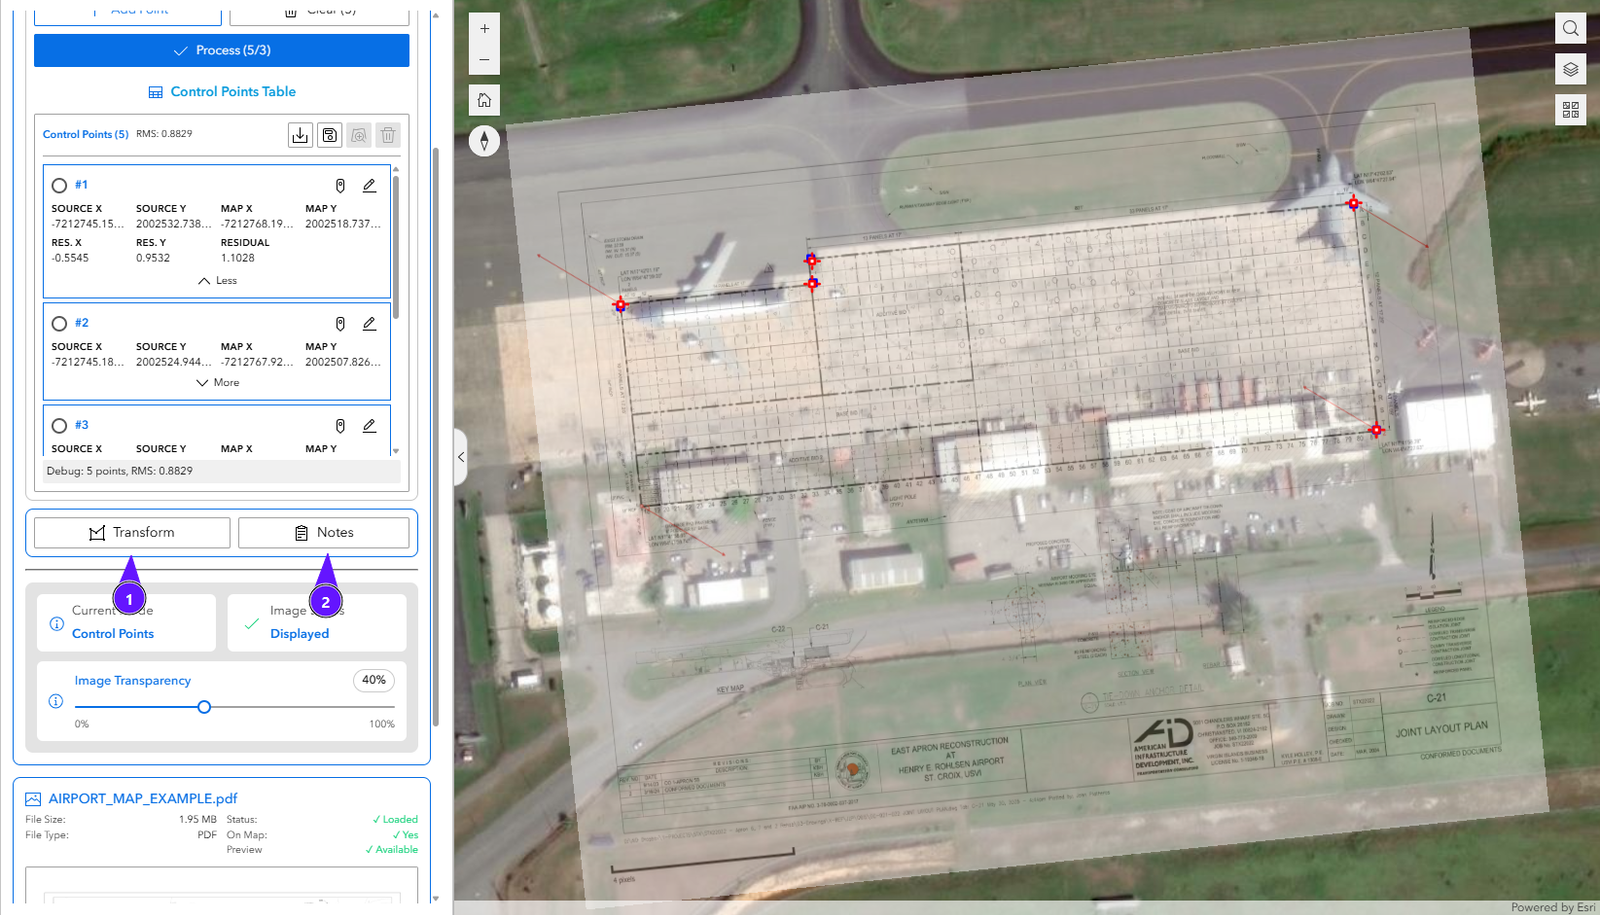
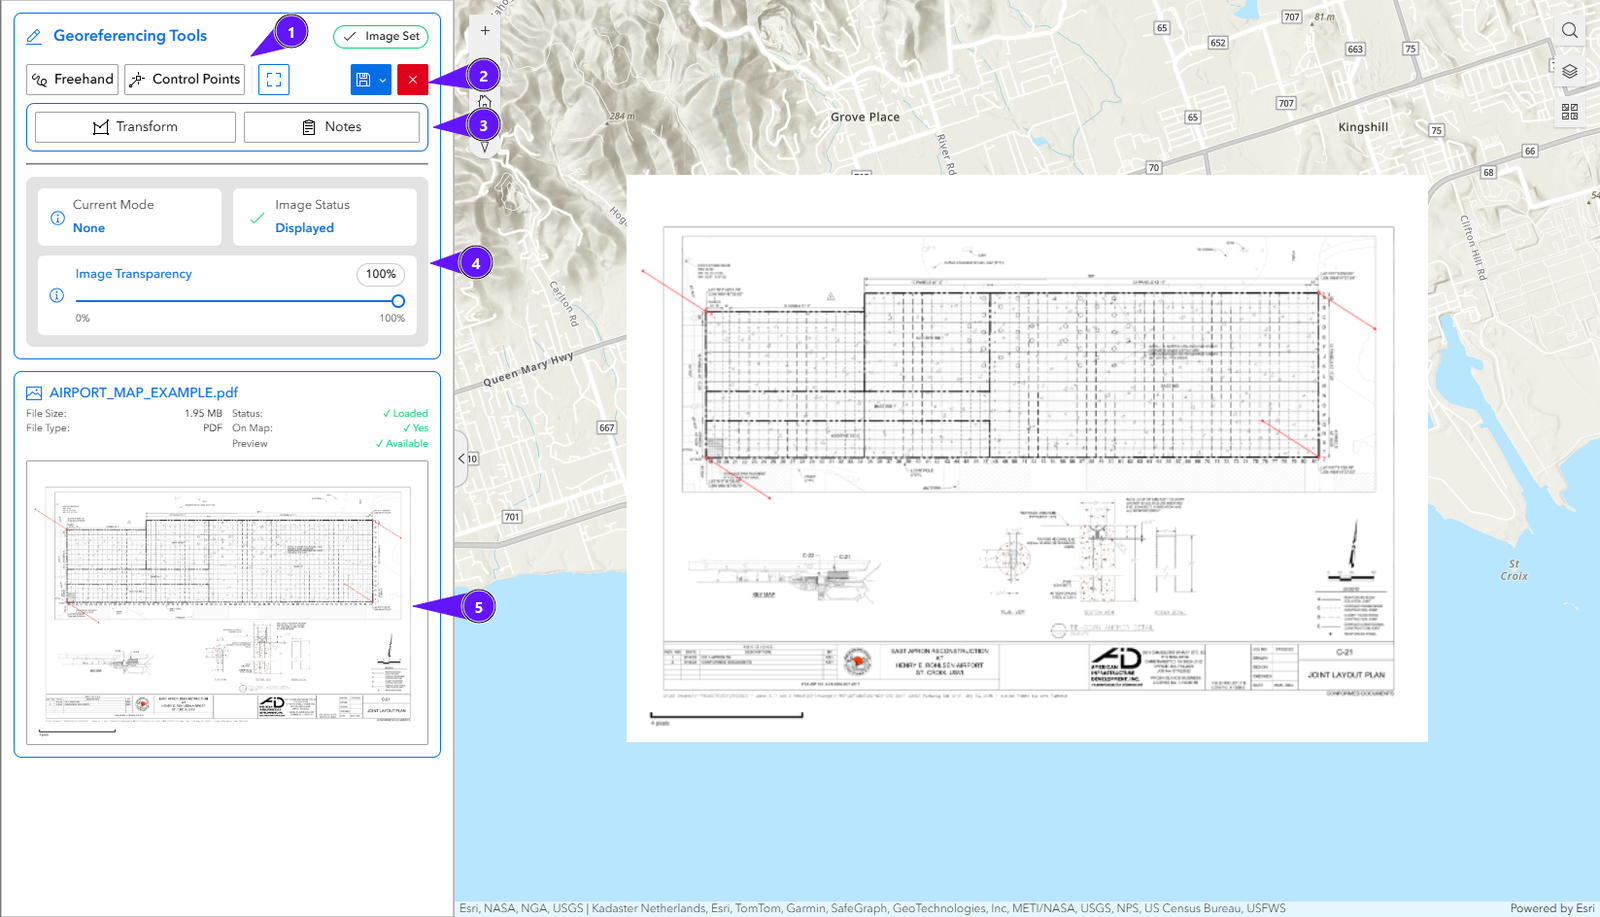
Once the image or PDF file is loaded, the panel that allows its transformation is displayed:
- Transformation Controls: Quick selection between Freehand, Control Points, and Center Image modes.
- Session Controls: Save and Exit buttons.
- Control Points Configuration: * Transform: Allows changing the mathematical transformation model.
- Notes: Displays technical information and requirements for each type of transformation.
- Information Card: Indicates the active transformation mode, image status, and a control (slider) to adjust transparency over the map.
- File Preview: Shows a preview of the file, its metadata (size, type), and its current processing status.
Adjustment Modes
Freehand (Manual Adjustment)
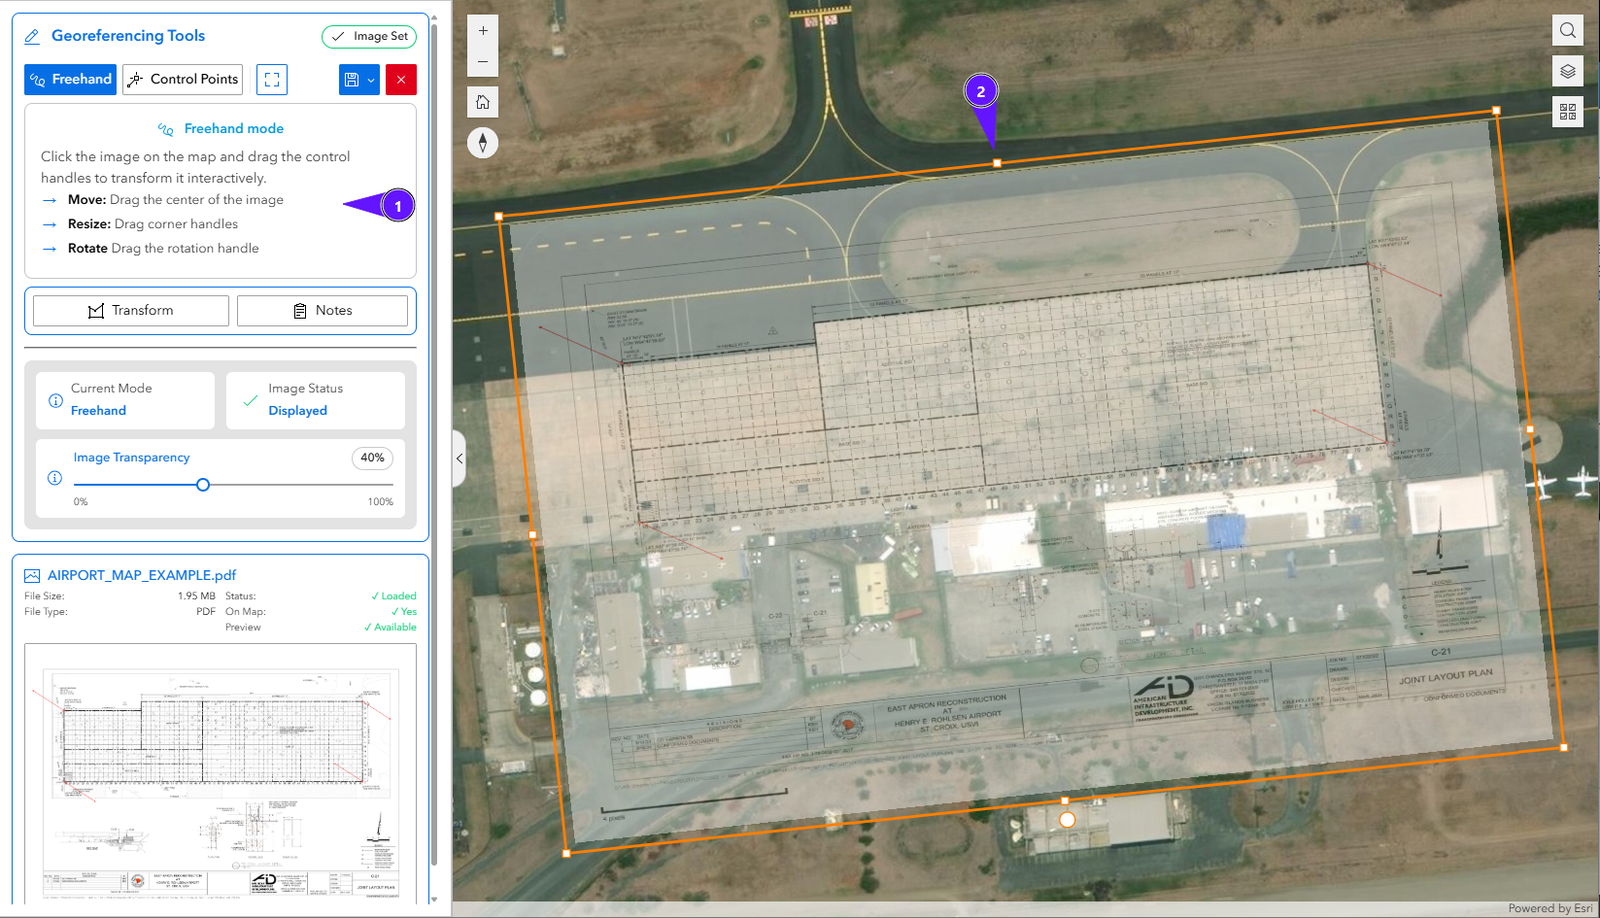
Allows moving, scaling, and rotating the image interactively to preliminarily adapt it to the required location on the map.
- Information panel on how to execute the manual transformation.
- While Freehand mode is active, clicking on the image on the map displays a control box (bounding box) that allows direct transformation with the cursor.
Control Points (GCP)
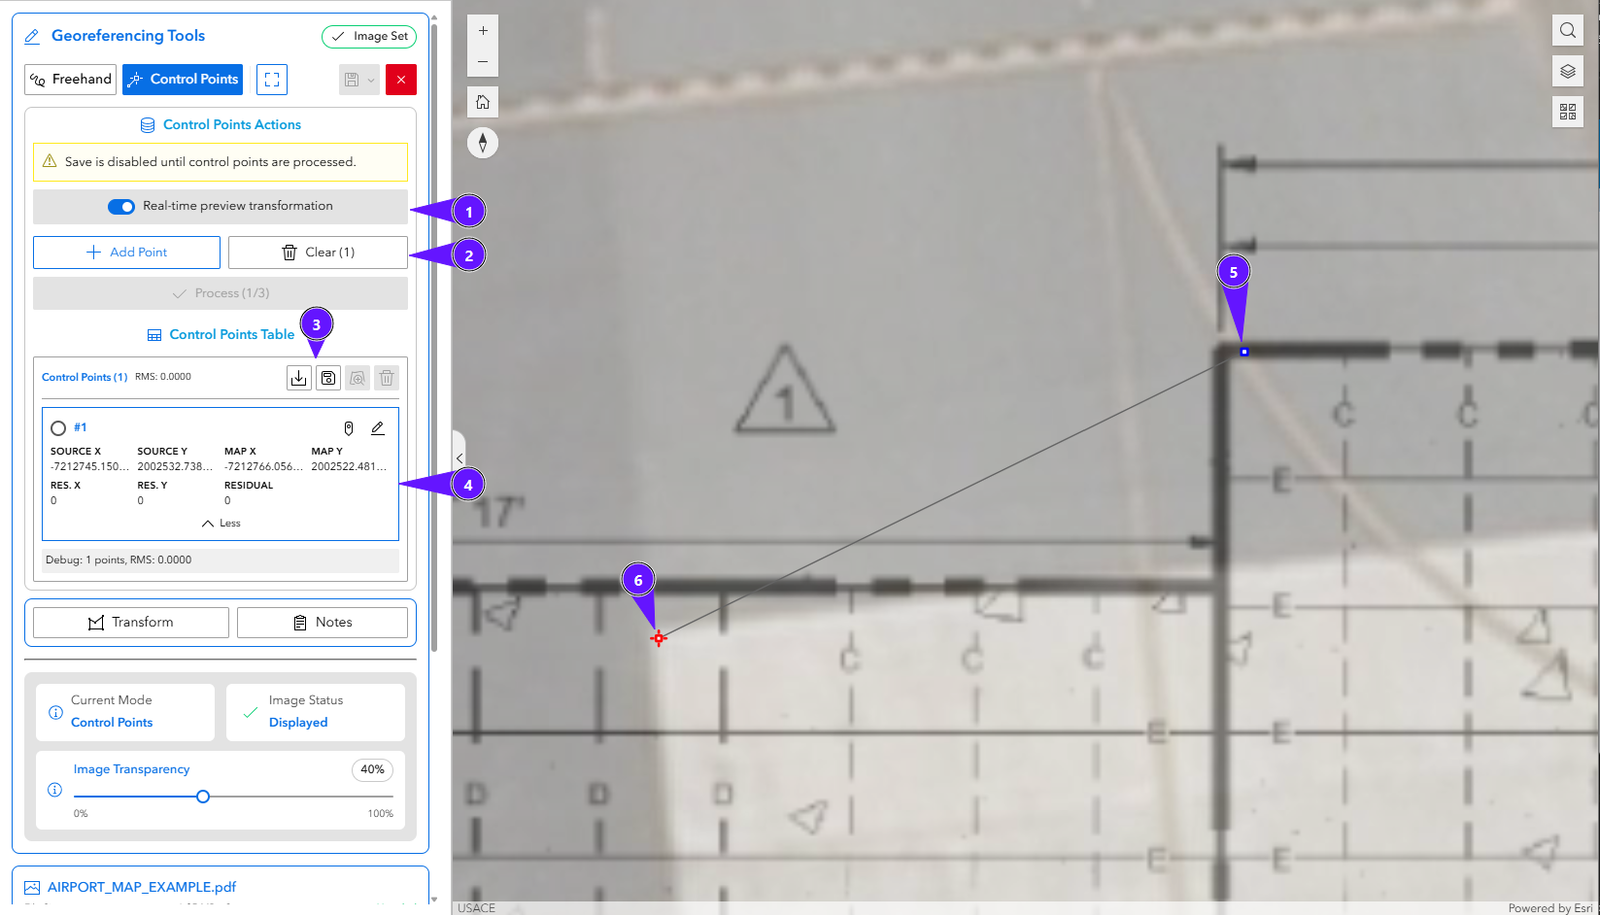
Allows transforming the image with precision based on Ground Control Points (GCP) that are added directly to link the image to the map.
- Real-time Preview: Allows seeing the dynamic transformation as points are added. It only activates if the minimum number of points required by the selected transformation type is met.
- Quick Management: Add point button to capture new points; Clear to delete all points and revert the image to its previous state.
- Import/Export: Controls to load control points from a file or save the current ones.
- Link Table: Detailed list of the added Control Points.
- Source: Source Control point on the map.
- Target: Target Control point on the map.
Control Point Management
Add Point
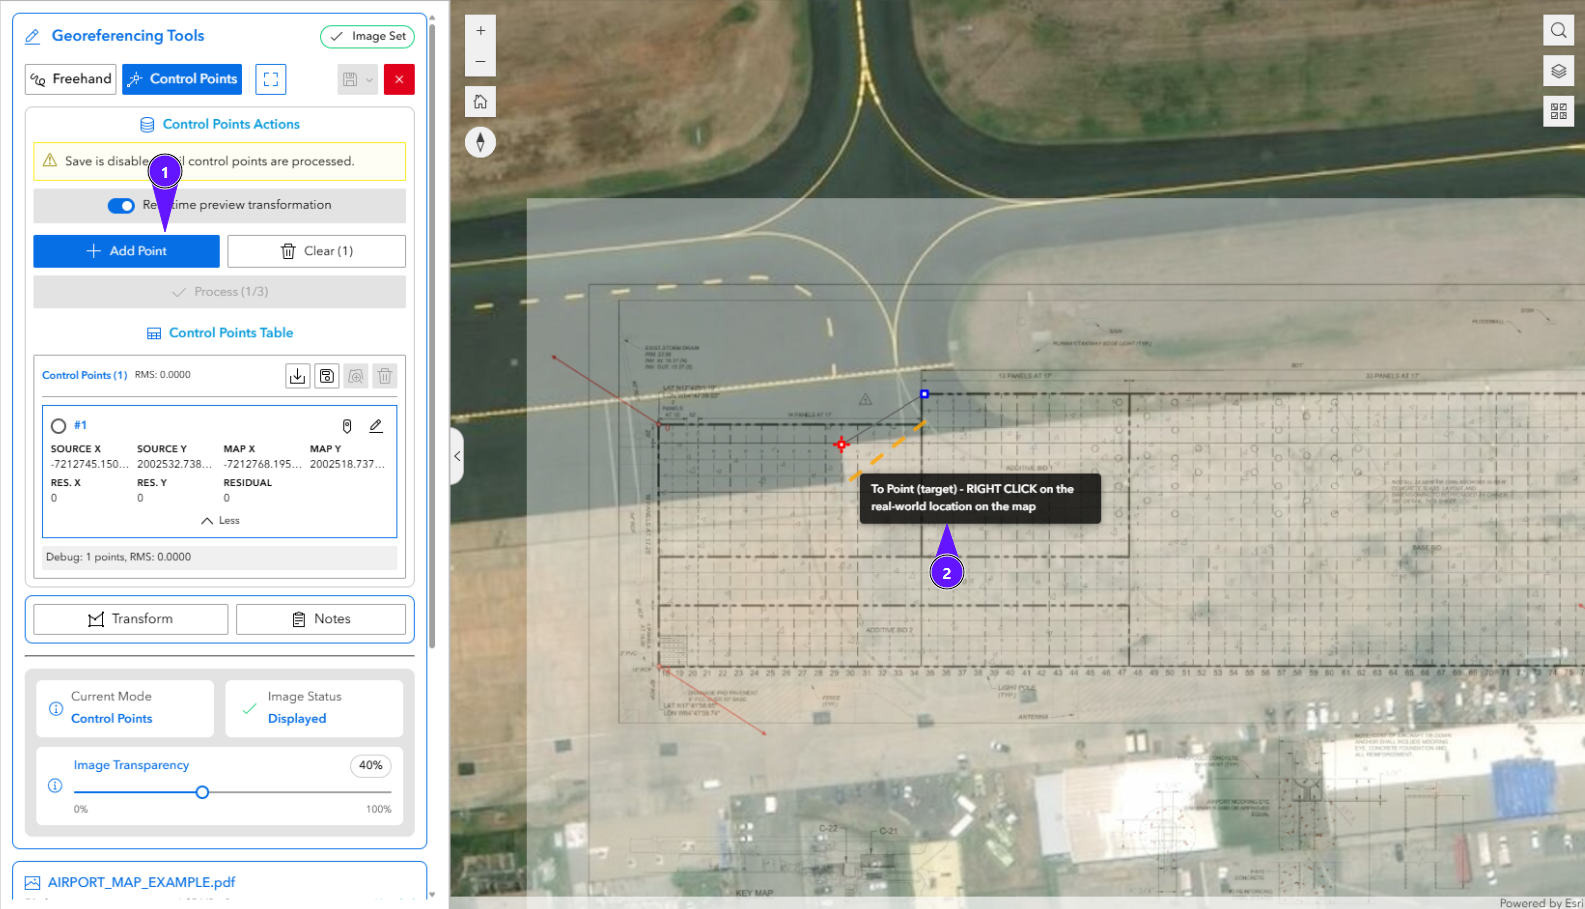
Allows registering new links. Only one point can be added at a time.
- Click on the Add point tool.
- Use the right-click of the mouse on the map to set the points. When marking the origin point (Source), an orange elastic line will appear indicating the live connection with the destination point (Target). Note: To add an additional link, you must click on Add point again.
Edit Control Point
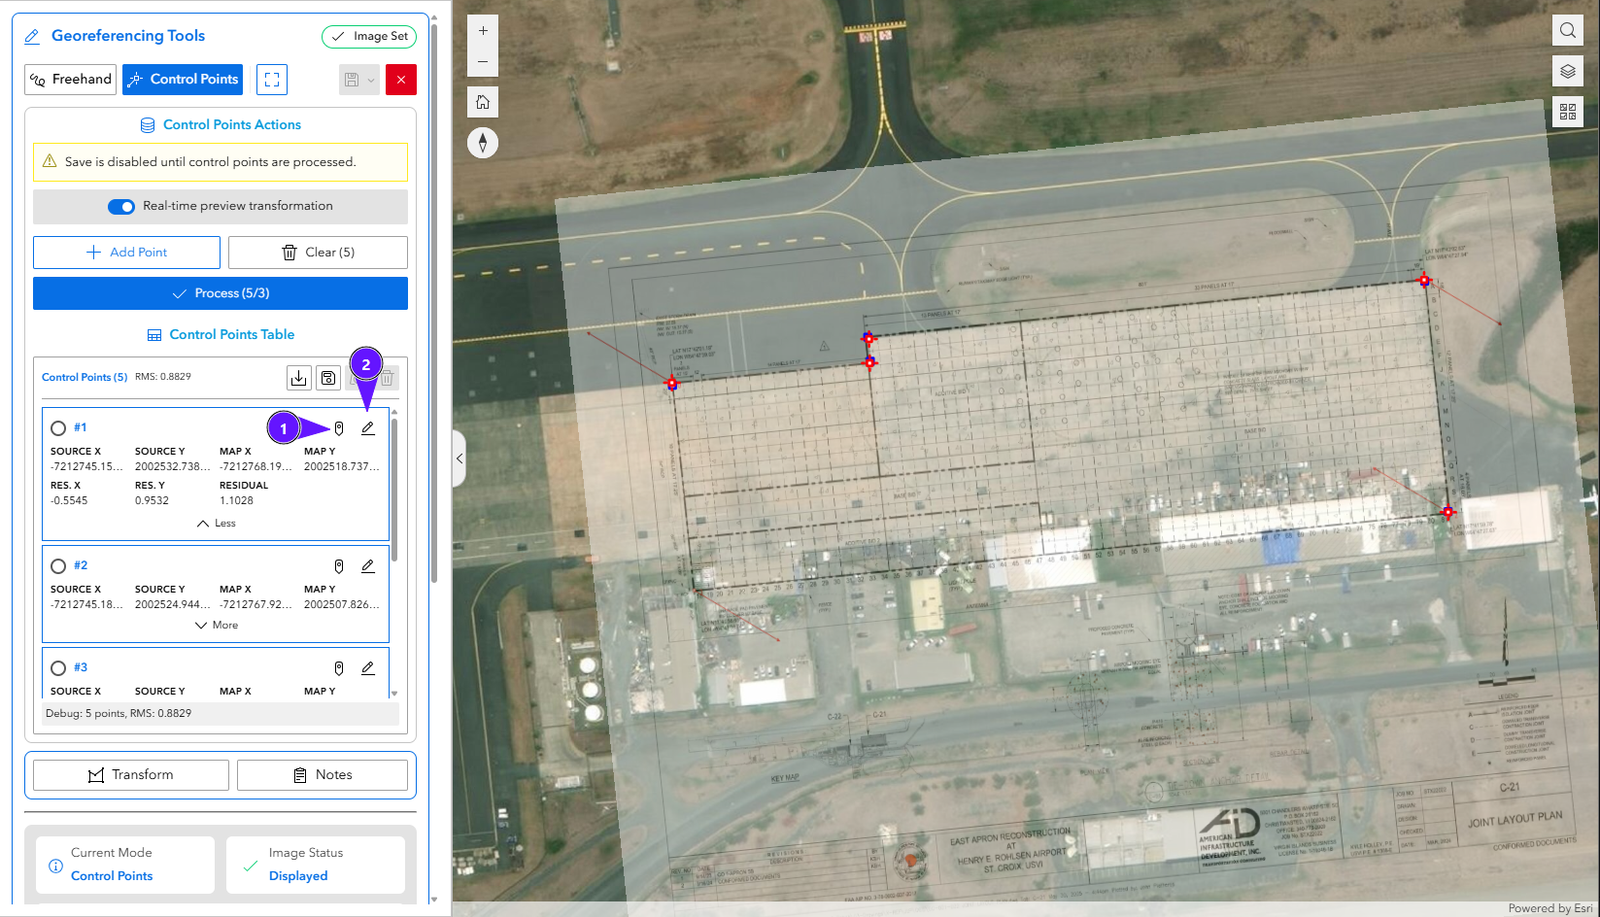
Allows modifying the location or values of a previously added Control Point.
- Graphical Editing: Clicking on the corresponding icon allows manually editing the position by dragging the Source and Target points on the map.
- Manual Editing: Clicking on the text edit icon allows modifying the exact coordinates directly in an input field (input).
On Map Editing
- A highlight is activated on the map over the point being edited, allowing it to be moved freely with the mouse.
- Once the point is repositioned, click the Save button.
- If necessary, you can Discard changes to return the point to its original position.
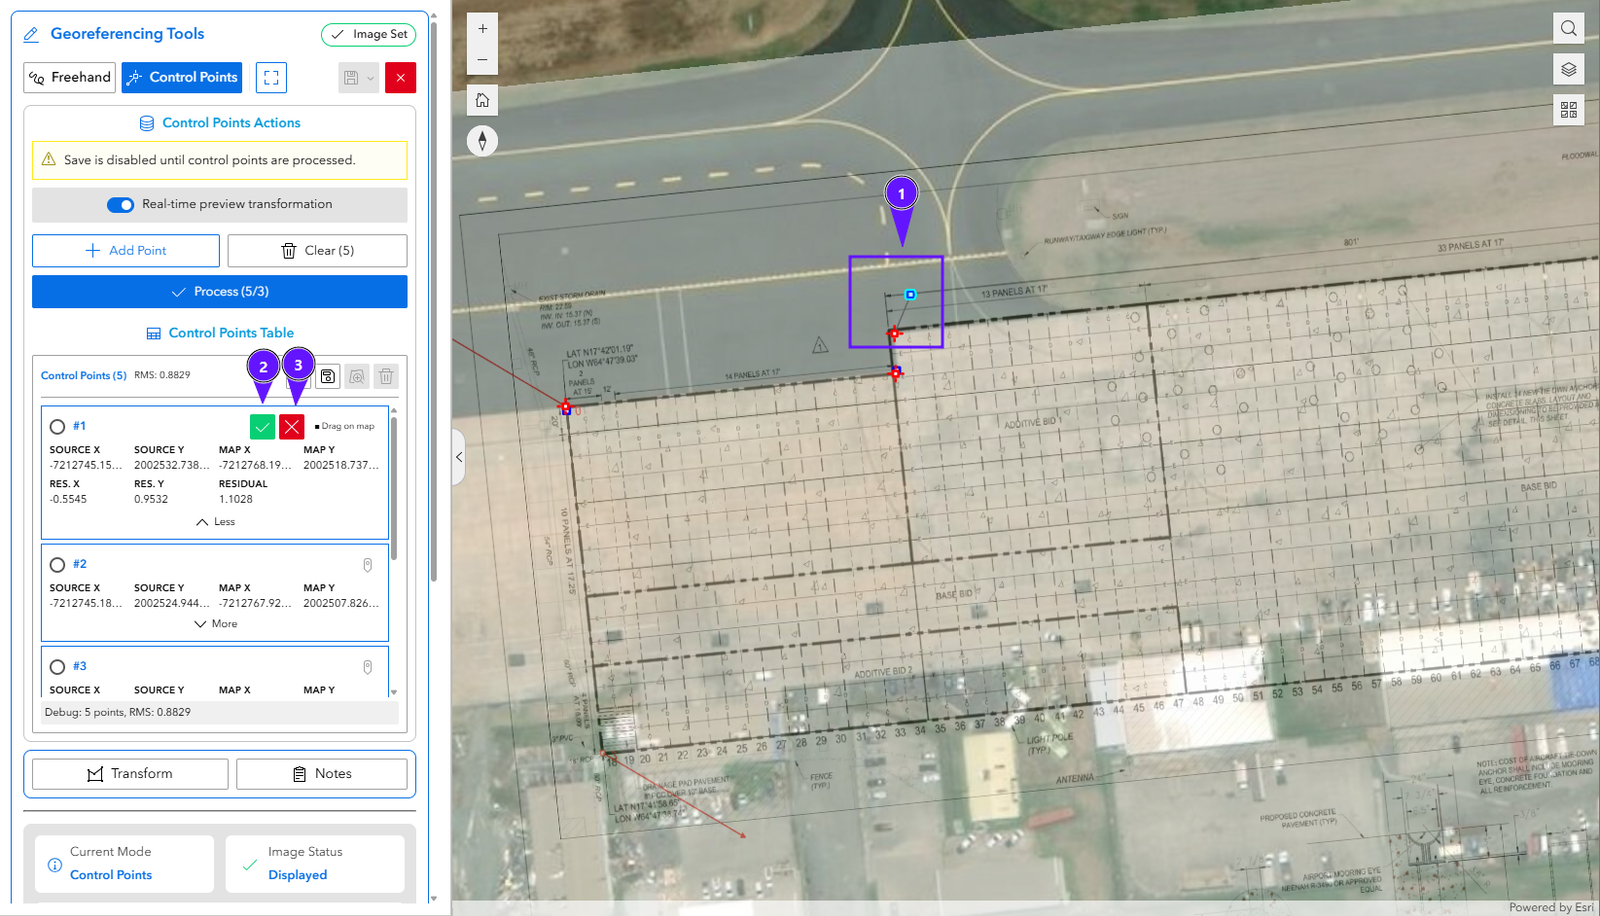
On Input Editing
- Enter the corresponding numerical values. When finished editing the coordinates, click to save changes.
- Use the discard option if you do not wish to apply the new coordinates.
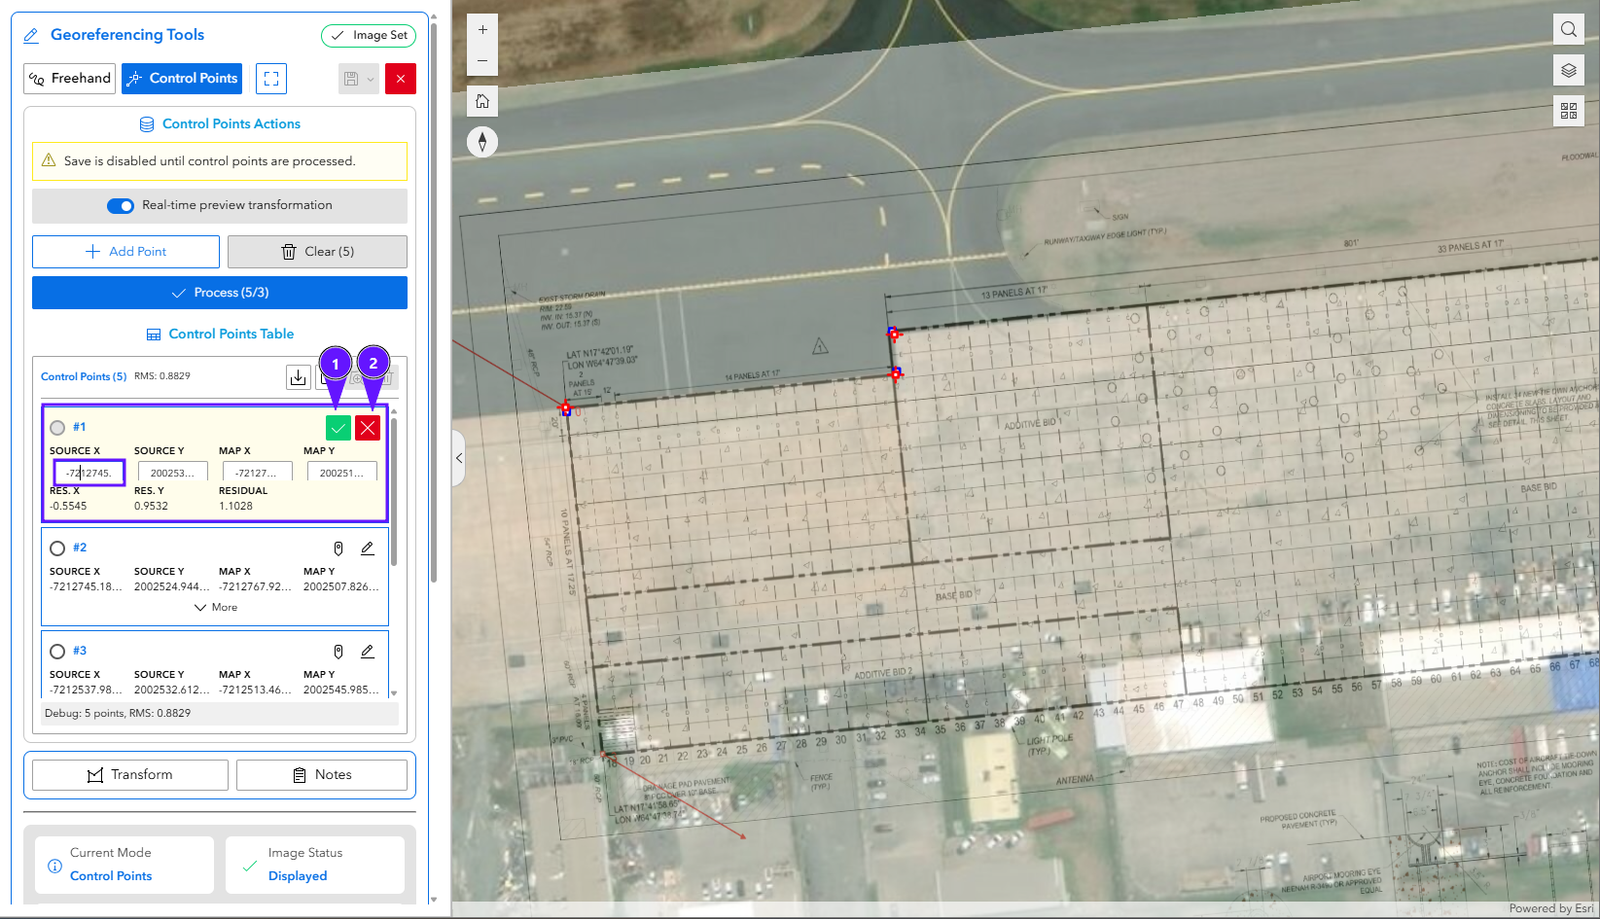
Processing and Exporting
Process
Allows running the rectification algorithm so that the image can be saved or downloaded.
- Once the points required by the selected transformation are added, the Process button is activated. Clicking it executes the calculations.
- Once the process is finished, the save button is enabled.
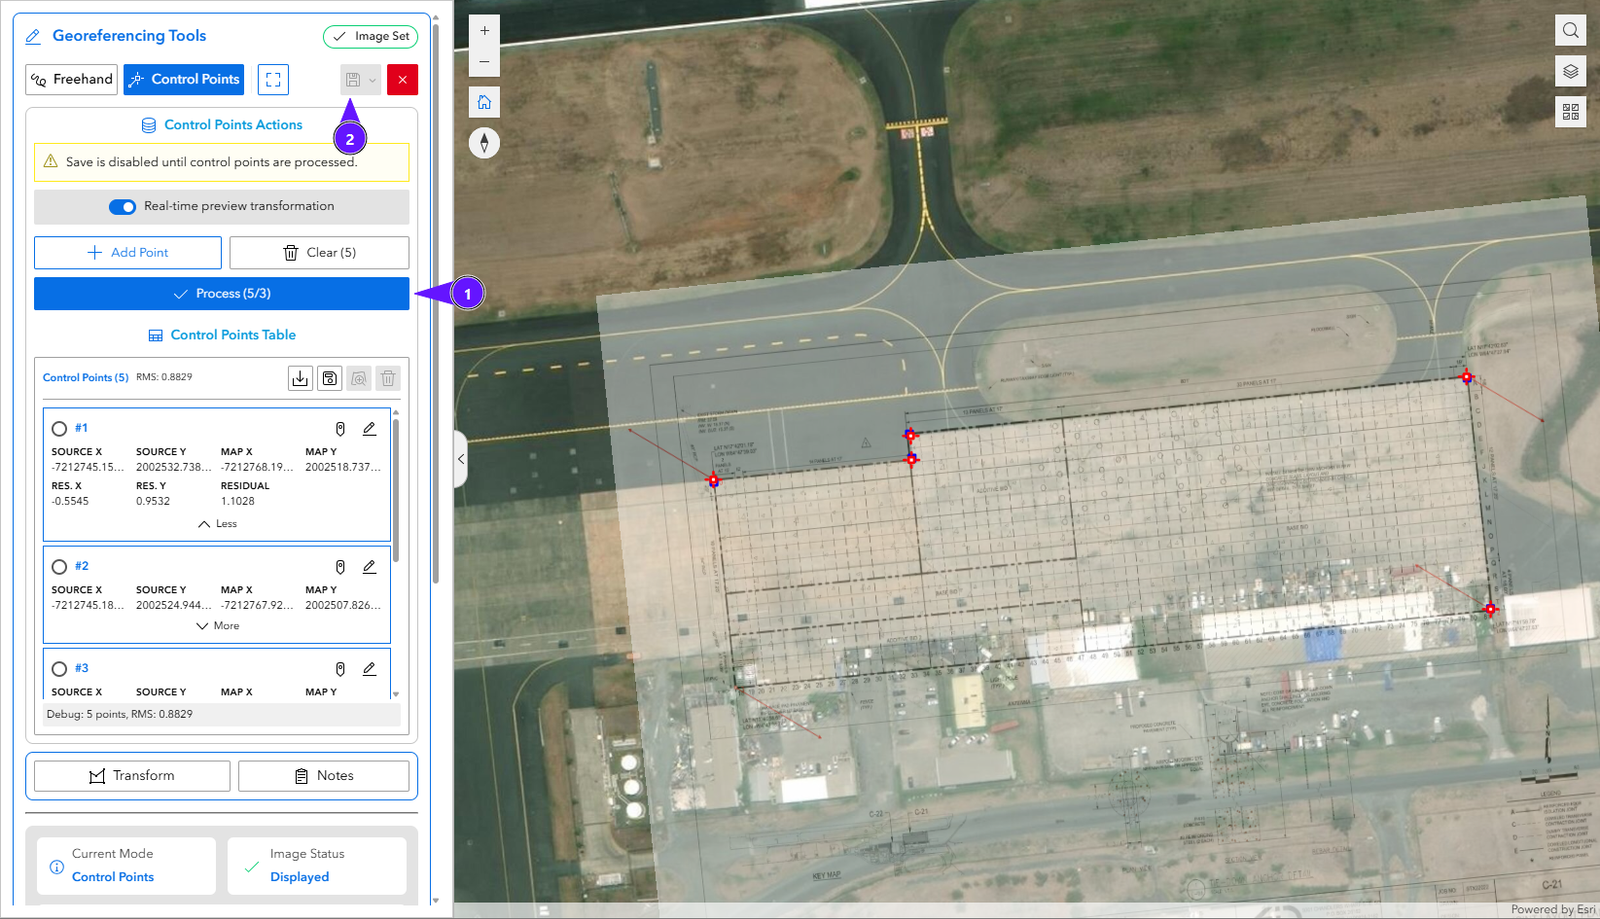
Save
Allows storing the georeferenced image in your ArcGIS Online or Portal for ArcGIS, or downloading it for desktop environments (such as ArcGIS Pro).
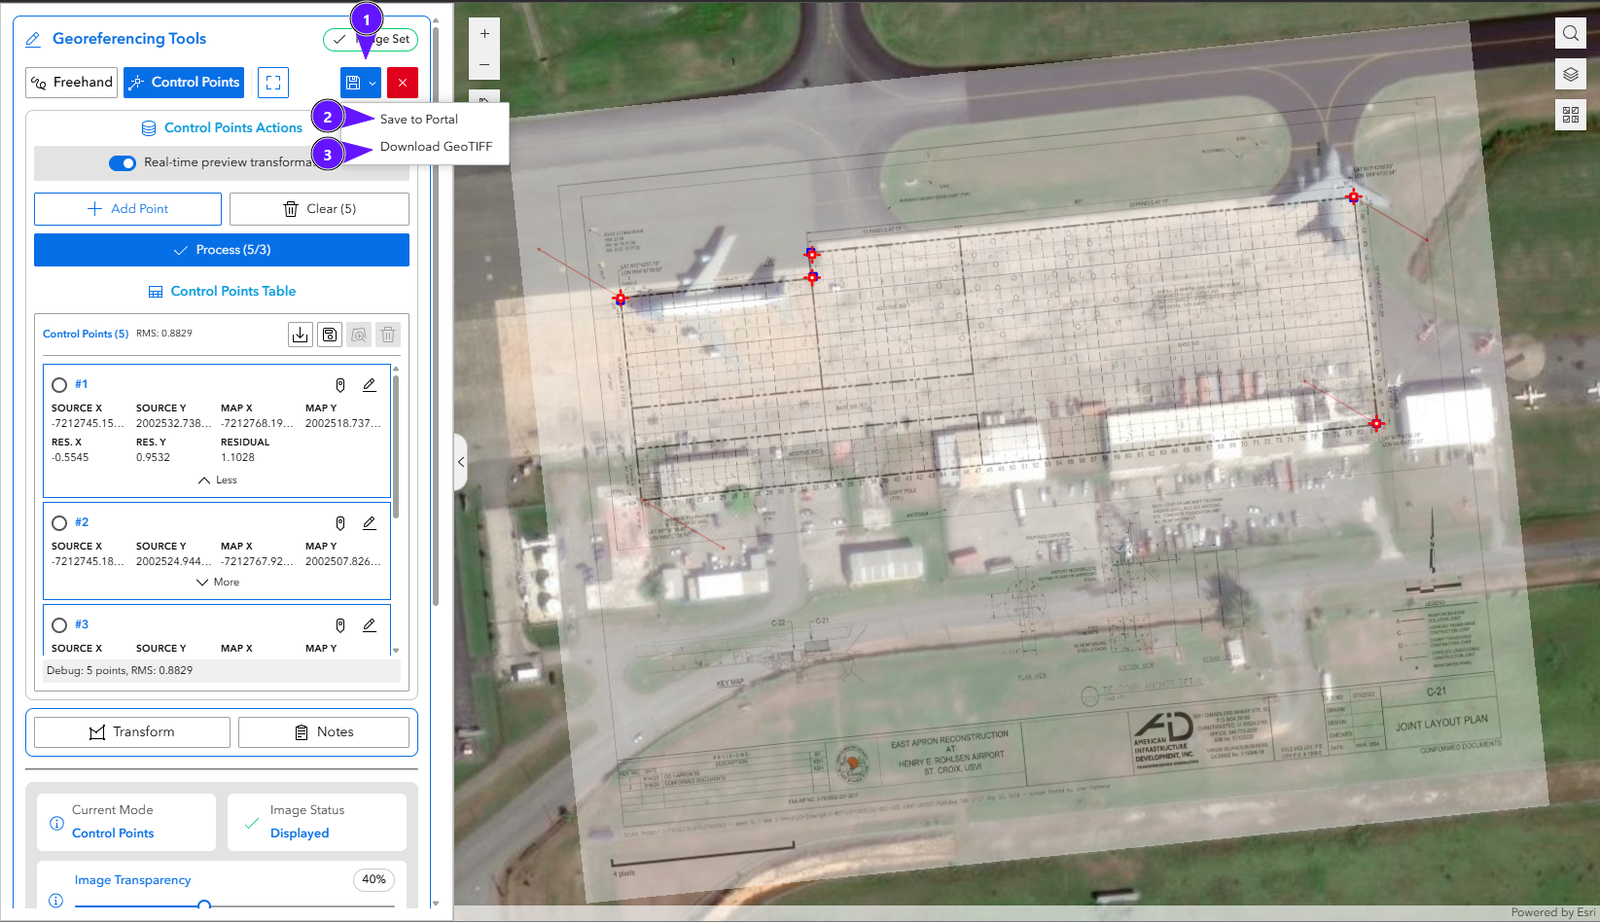
Transformation Types
Allows toggling the mathematical model applied to the control points and viewing the technical details of each.
- Selector to change the type of transformation to apply.
- Information button to learn the requirements of each transformation (e.g., minimum number of points).