Manual
Advanced Editing Widget
Overview
Power and precision for professional editing in ArcGIS Experience Builder.
Optimize your spatial data management with a tool designed for efficiency. The Advanced Editing widget allows you to edit feature layers in ArcGIS Enterprise and Online, integrating advanced capabilities that go beyond standard tools:
- Intelligent Automation: Custom automatic validations and calculations using ArcGIS Arcade expressions.
- Mass Productivity: Batch editing for simultaneous updates of multiple records.
- Infrastructure Control: Basic integration with Utility Network rules to maintain the integrity of your networks.
Getting Started
Installation
To install an Experience Builder widget, follow the instructions at: Arcgis: Add custom widget
Configuration
The configuration panel has three sections:
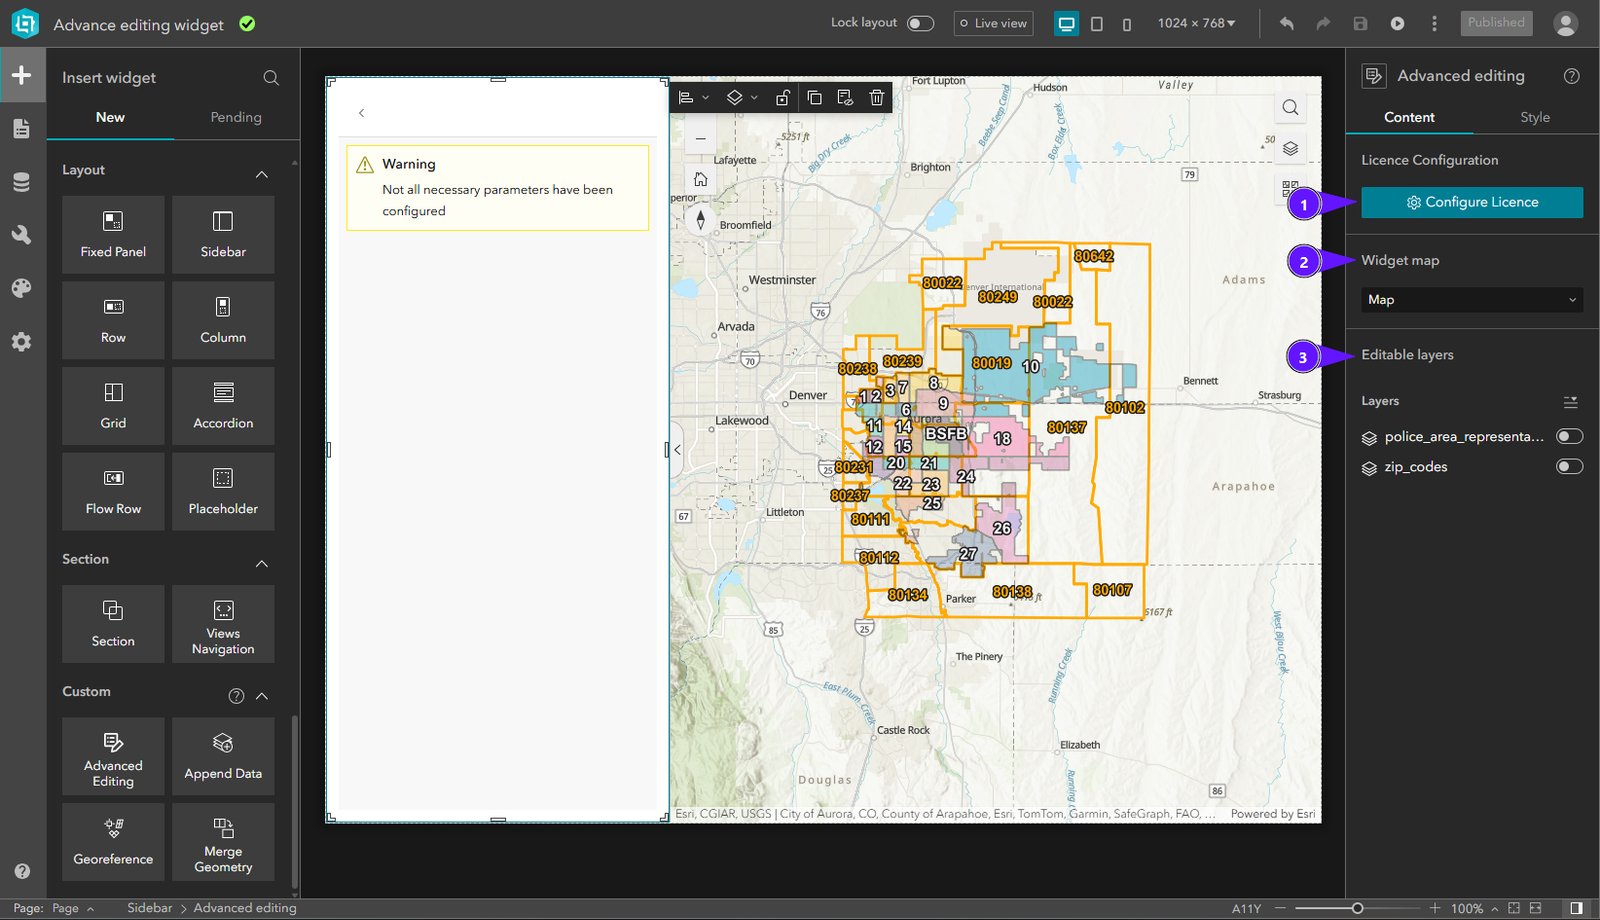
- License Configuration
- Map settings
- Layers settings
License Configuration
To activate the widget license:
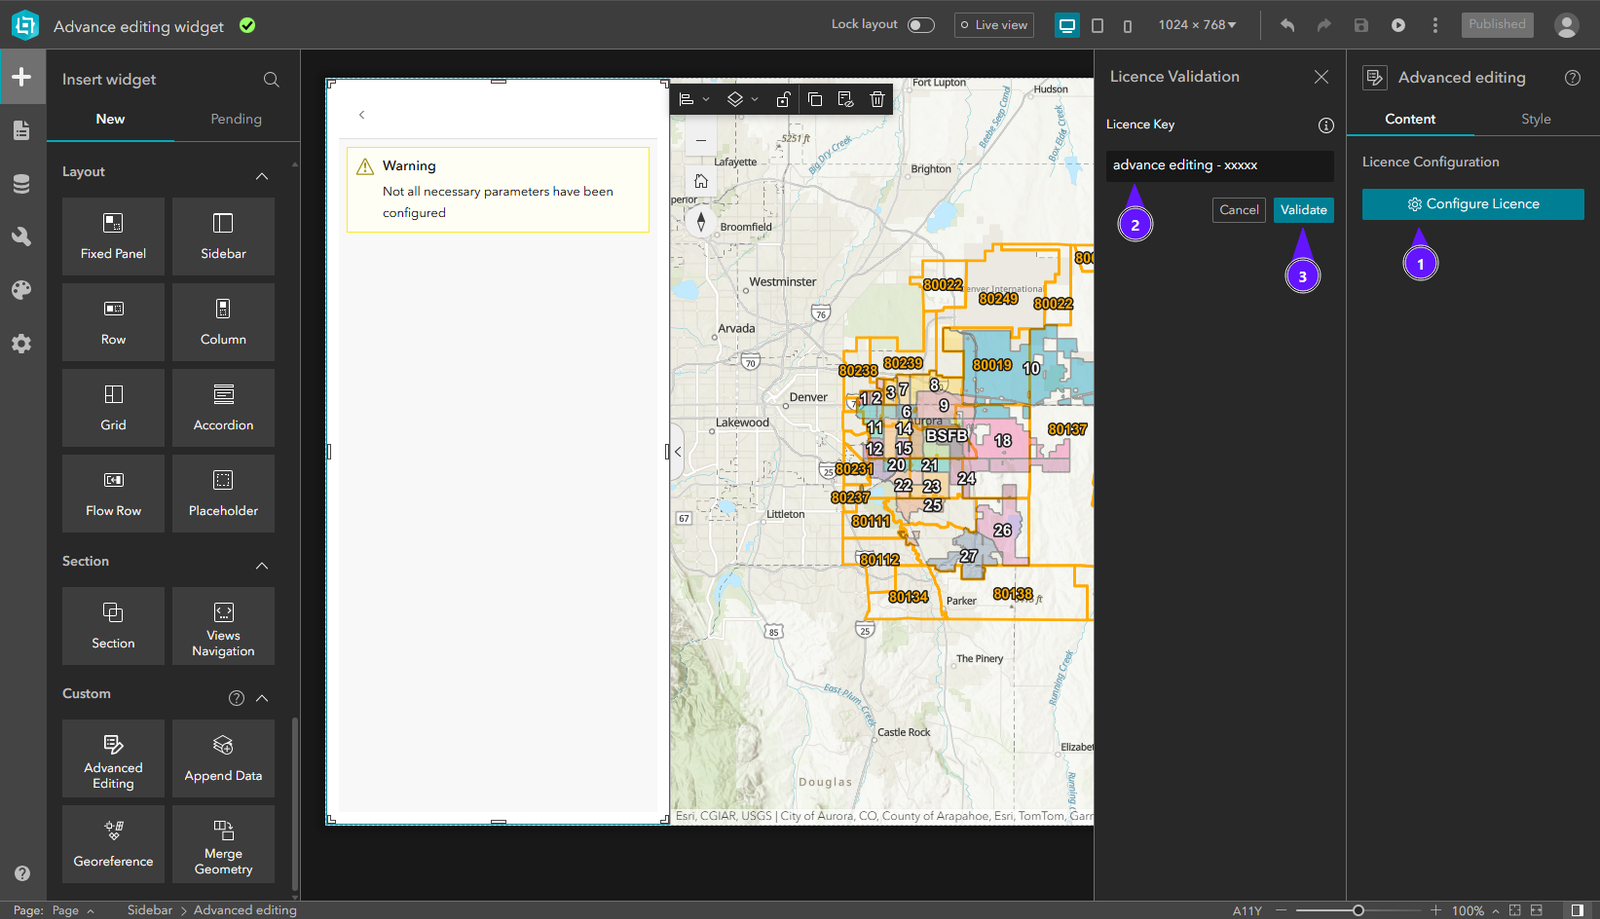
- In the right panel, click Configure Licence.
- Enter your license key in the input field.
- Click Validate.
Once validated, the widget is fully functional.
Select Map Widget
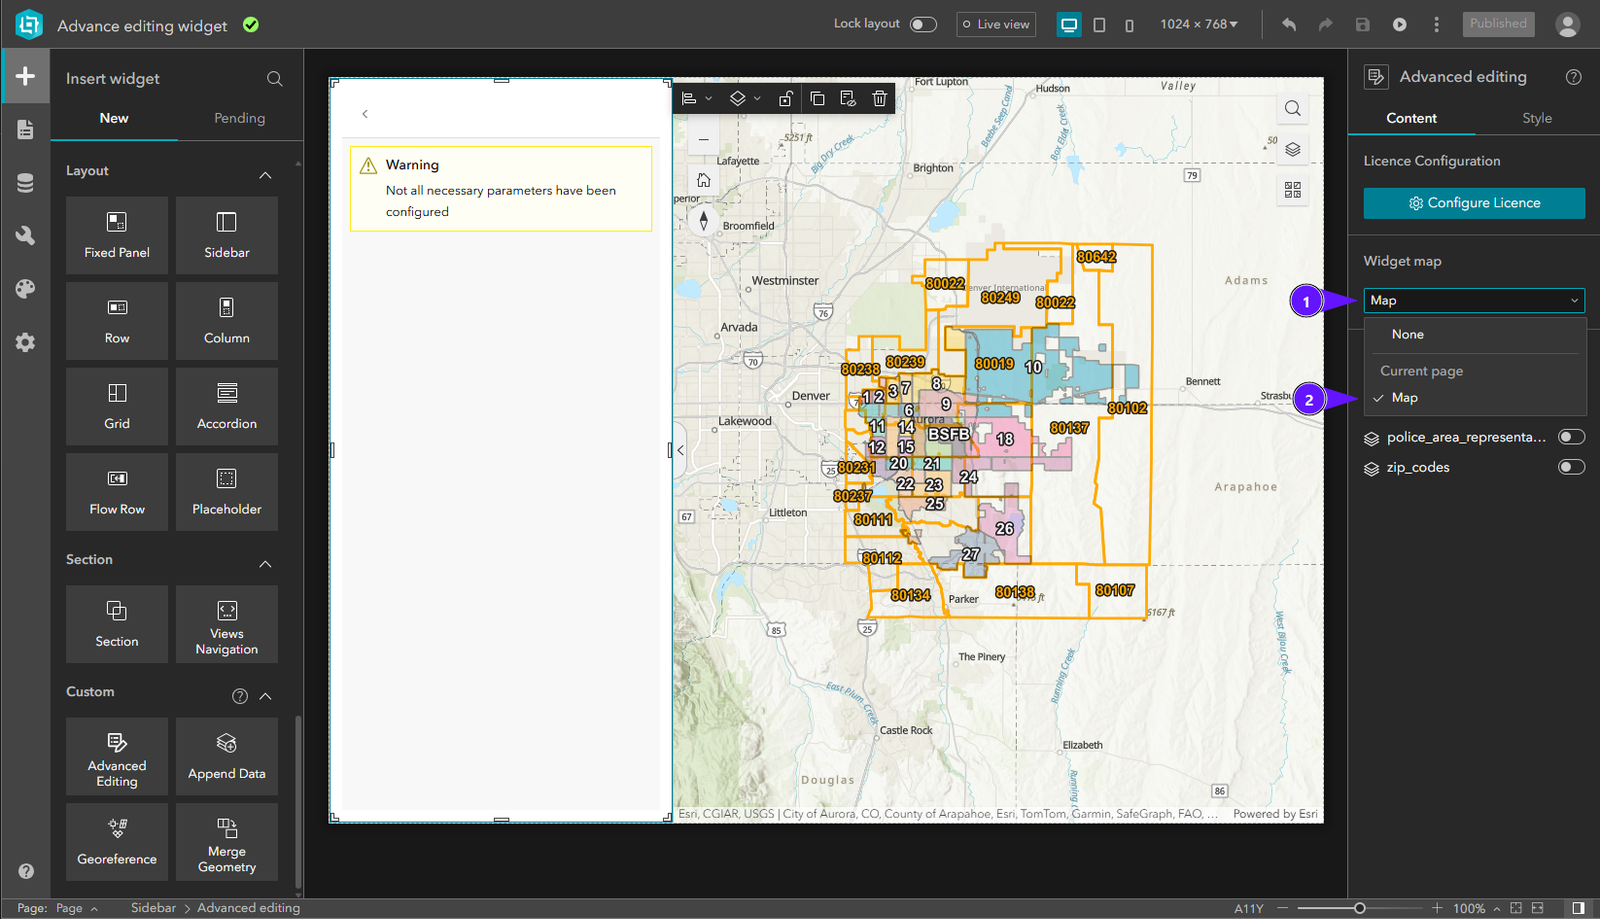
In Select Map Widget, open the dropdown (1) and choose the map (2) to use with this widget.
Select Layers
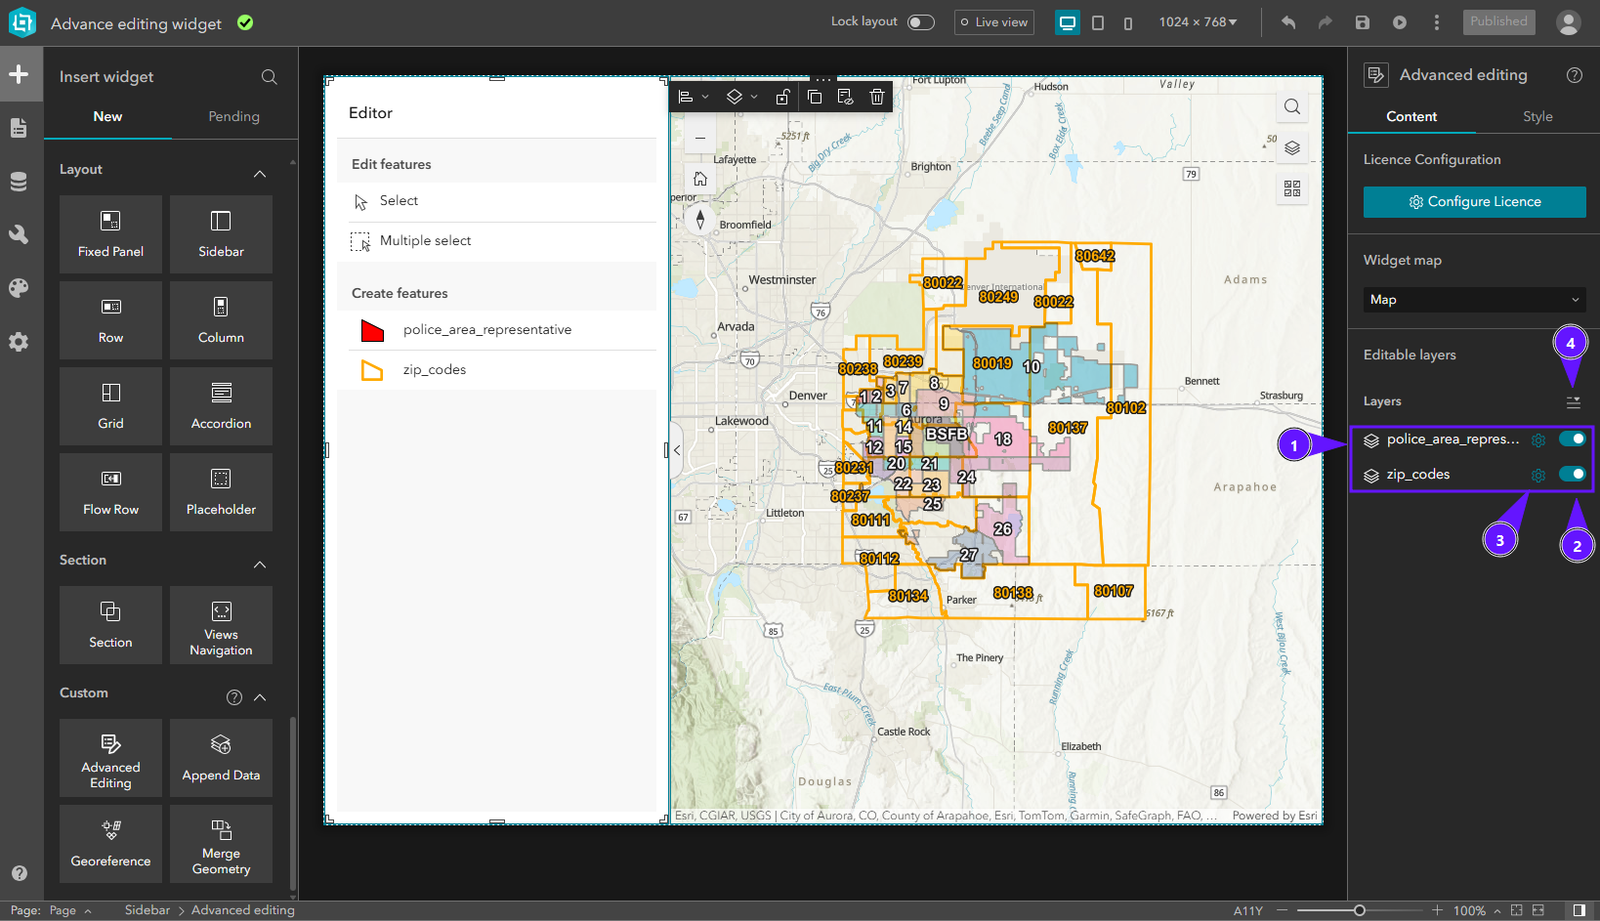
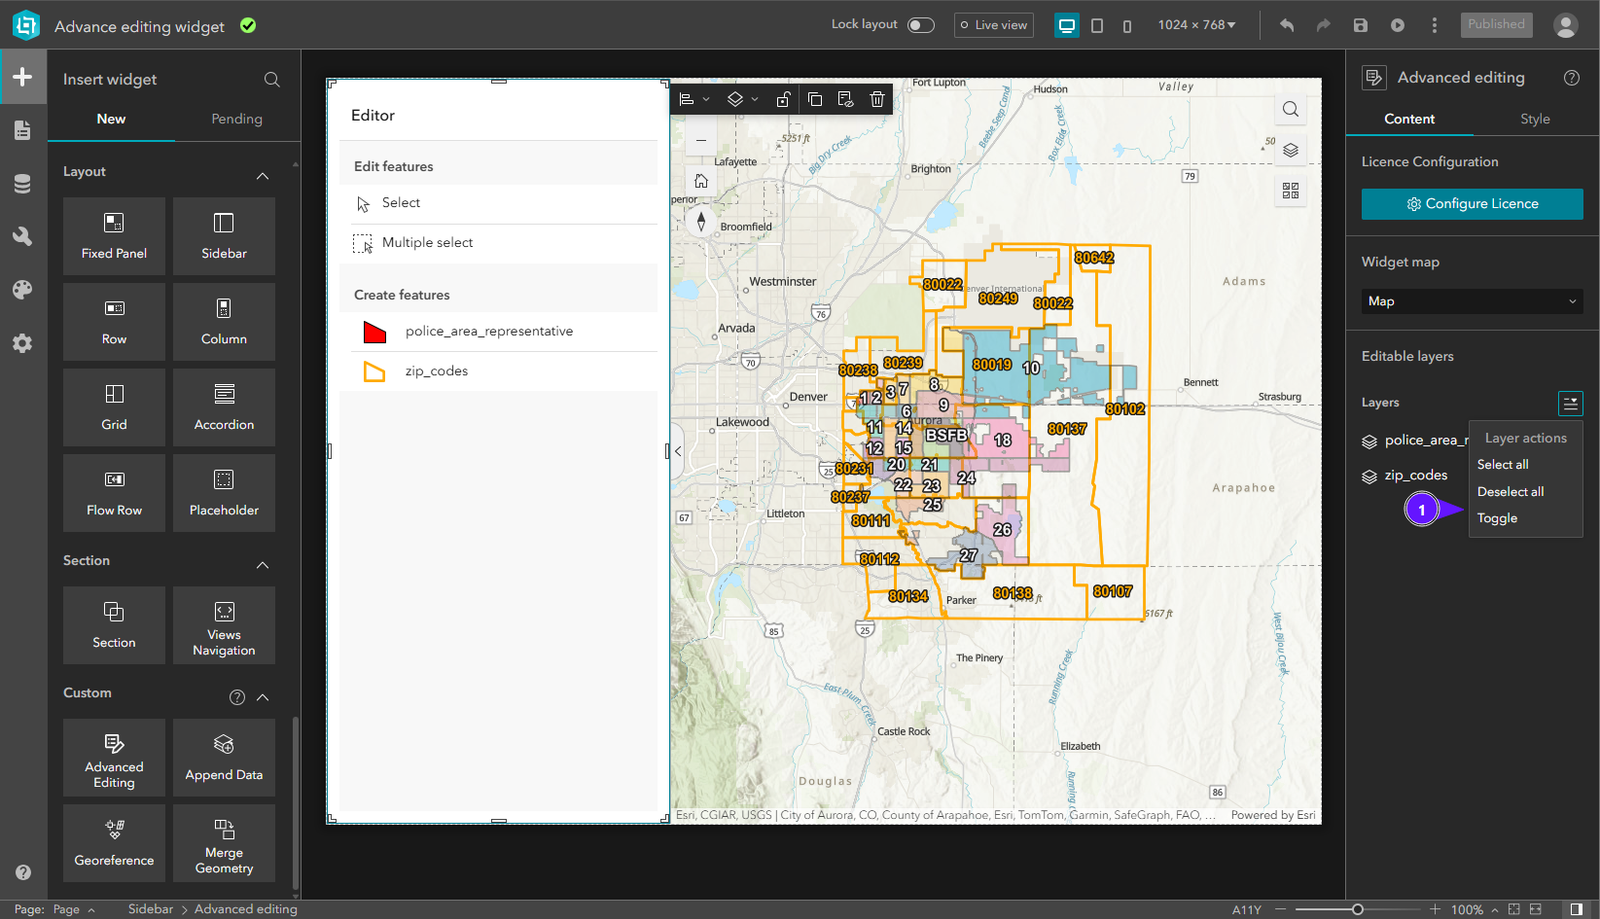
In Select Layers, the layer list (1) lists layers available in the published app. Enable or disable layers (2) for editing operations. Configure the layer (3) with its fields, validations, and calculations. Use the quick-select tool (4) to select layers faster.
Usage
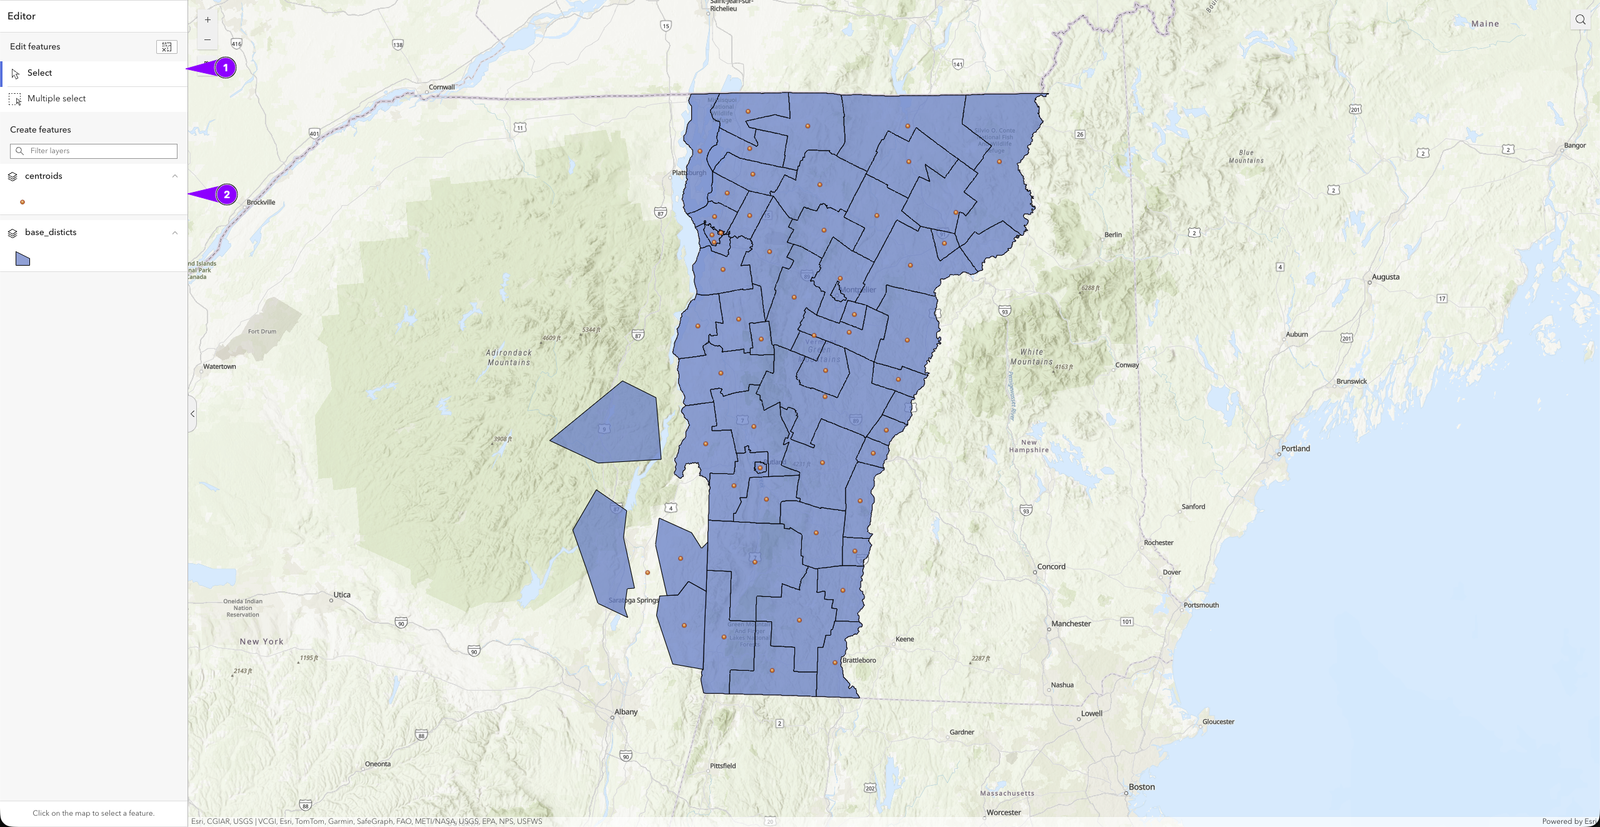
When we log into the platform, the first things we will see are the editing tools (1) and the creation tools (2).
Editing Tools
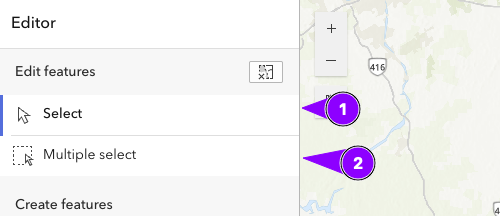
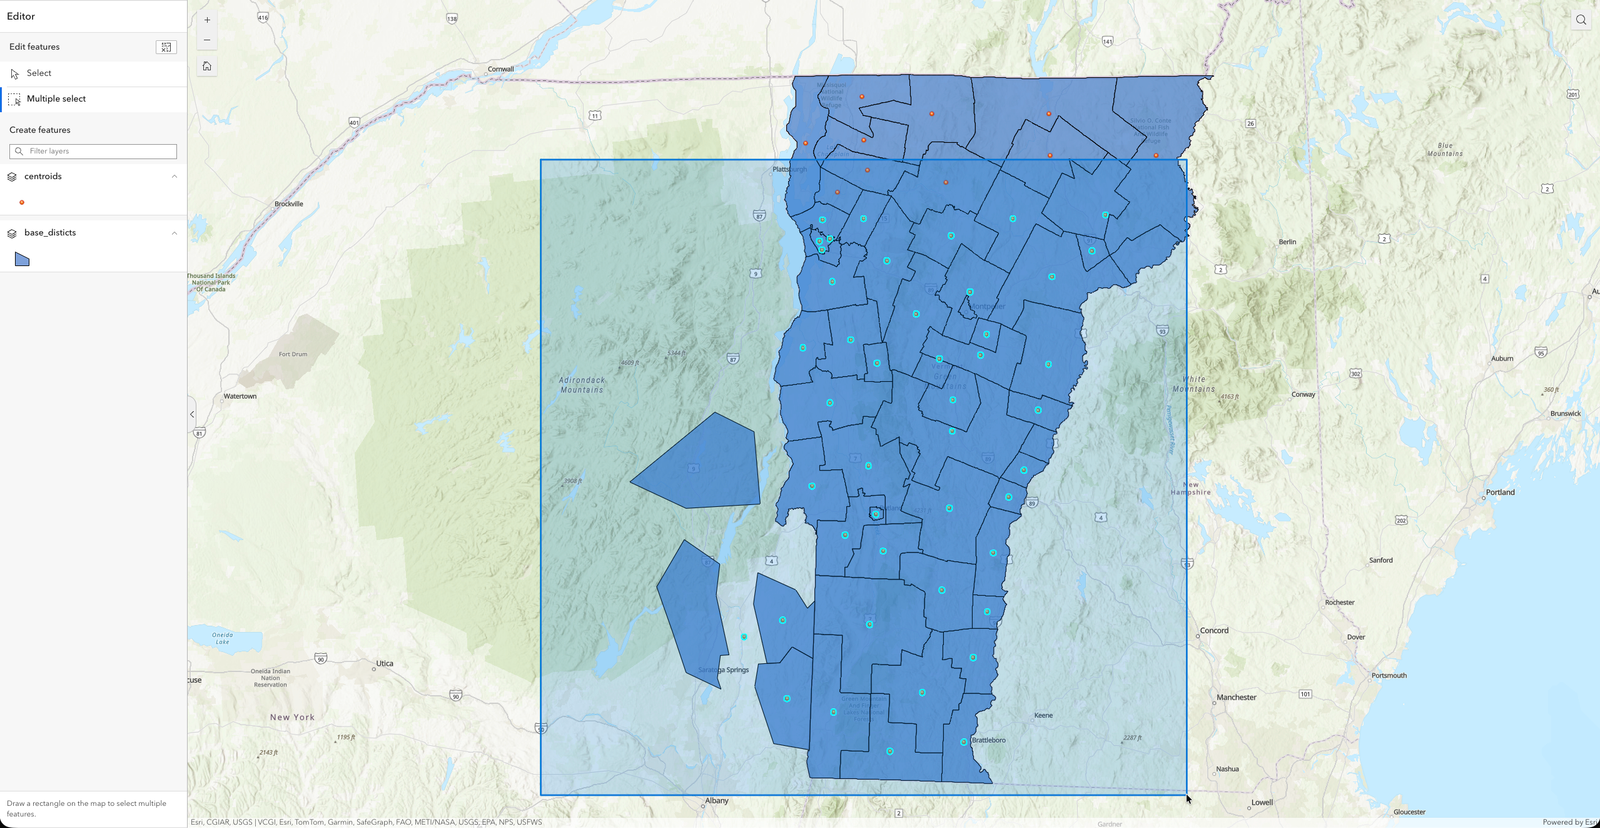
The platform features two tools for editing: (1) allows you to select geometries one by one, and (2) allows you to select multiple features at the same time for batch editing.
In this example, you can see how to select multiple elements using the Rectangular Selection tool.
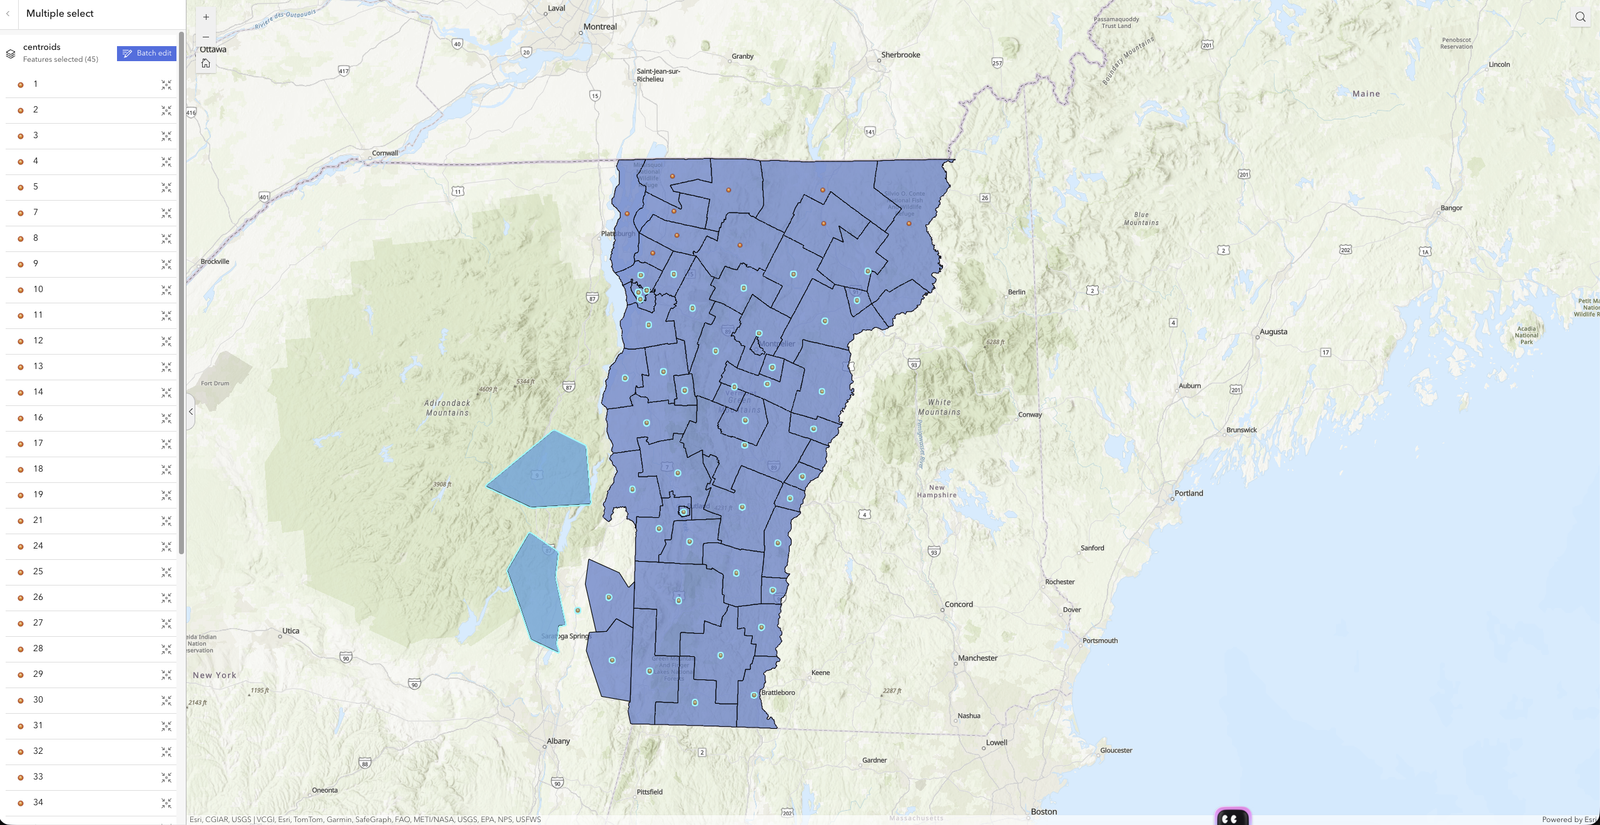
Once you've selected the features, you'll see a list of the selected items. Here, you can choose whether to edit a specific one or perform a batch edit. In either case, you'll be taken to a form where you can edit the attributes.
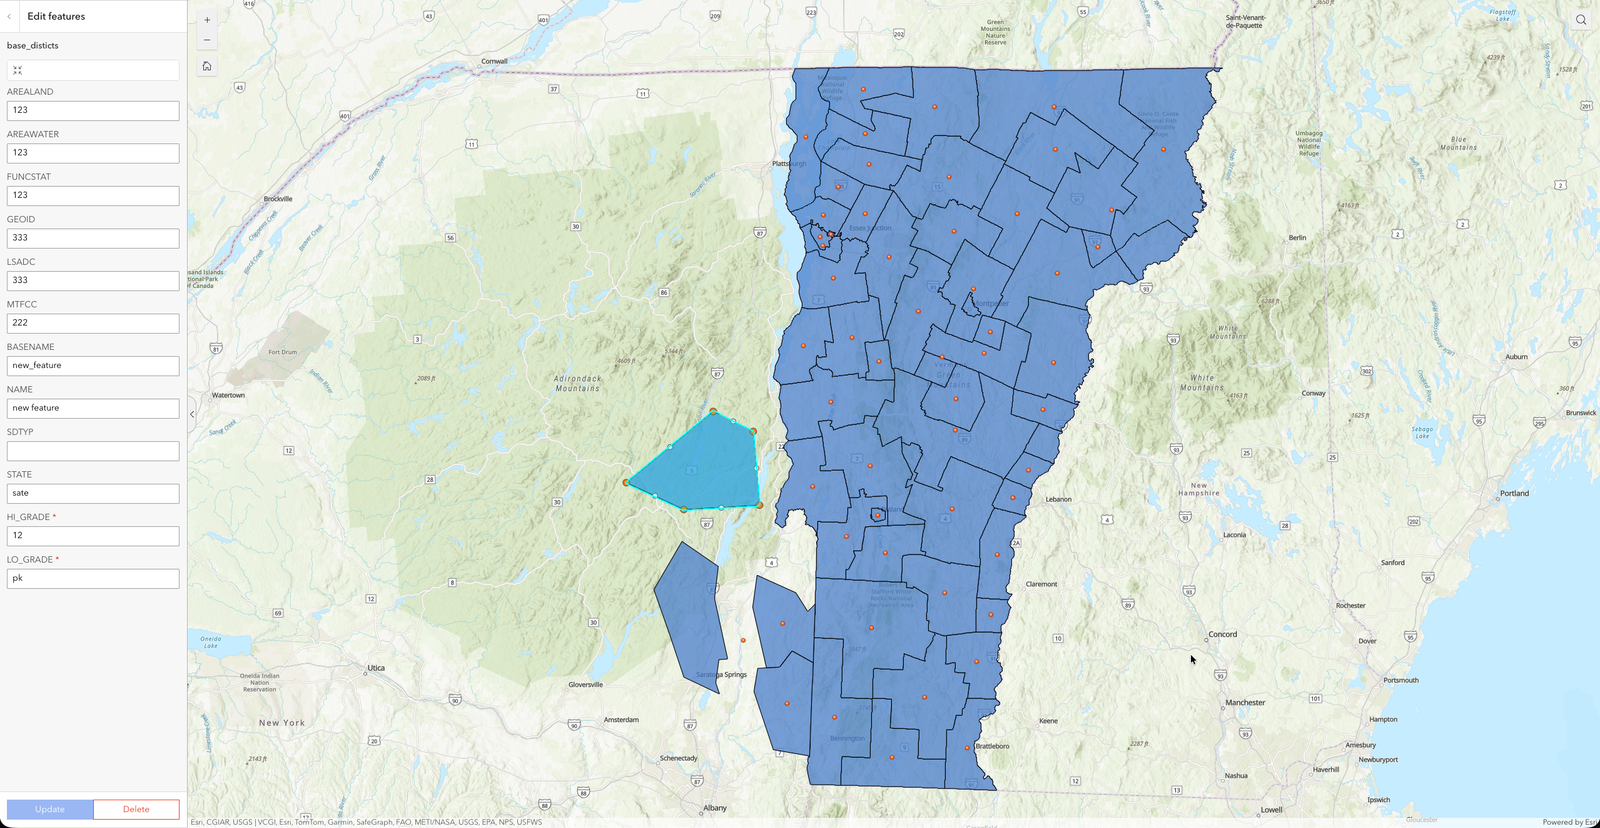
When we edit a specific feature, we'll have the option to modify its control points—that is, to edit its geometry.
Creation Tools
The creation tools allow us to add new features to the layers we already have. This tool detects the type of layer we have selected and automatically creates the tool so that we can manually add features by drawing on the map.
Example
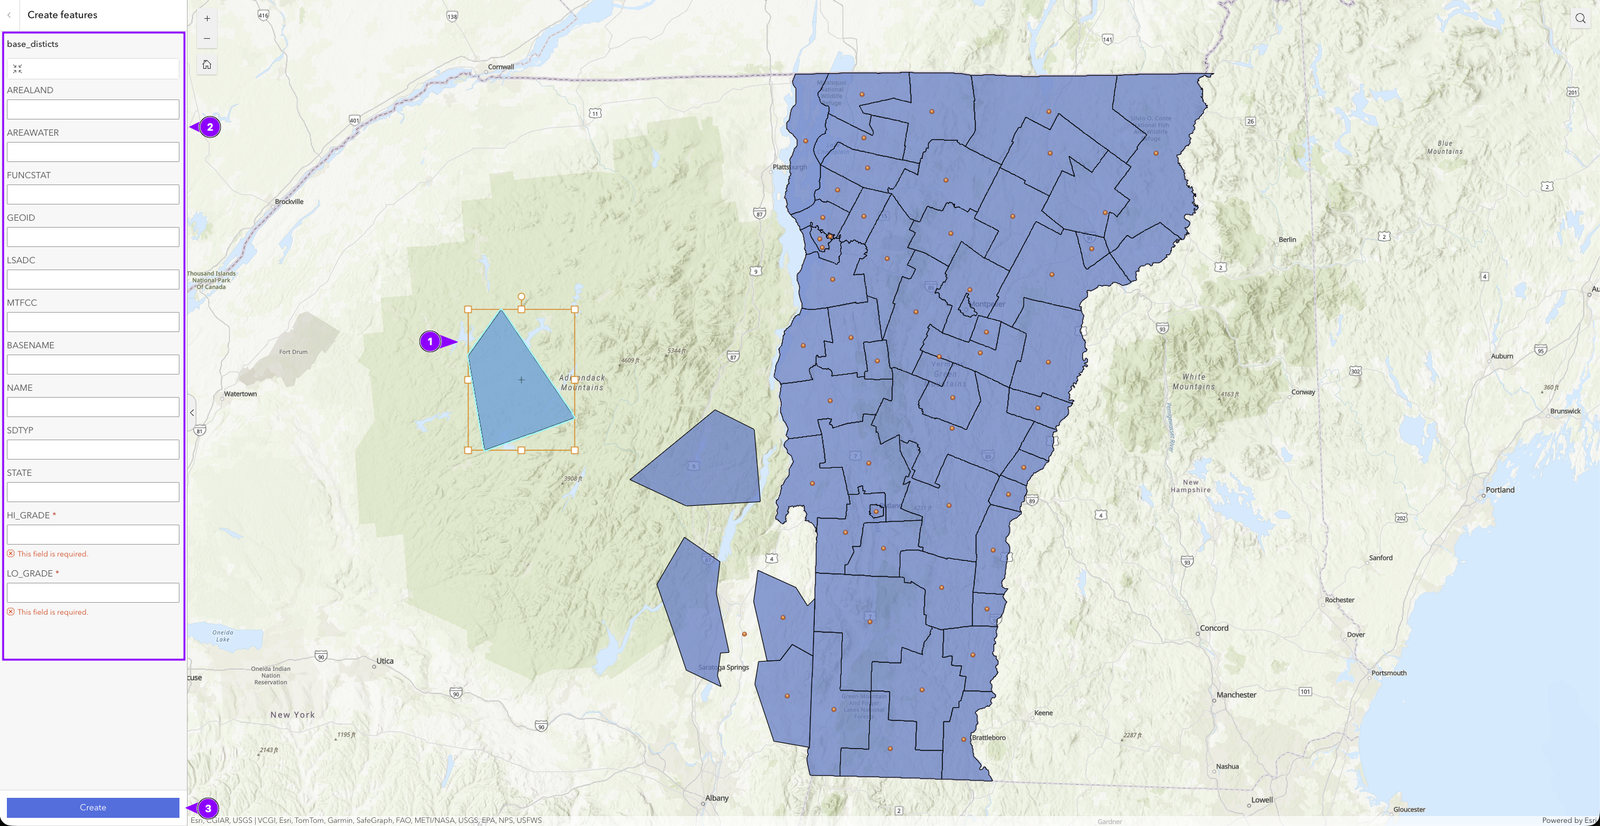
In this example, we select the “base_districts” polygon layer to add new features to it.
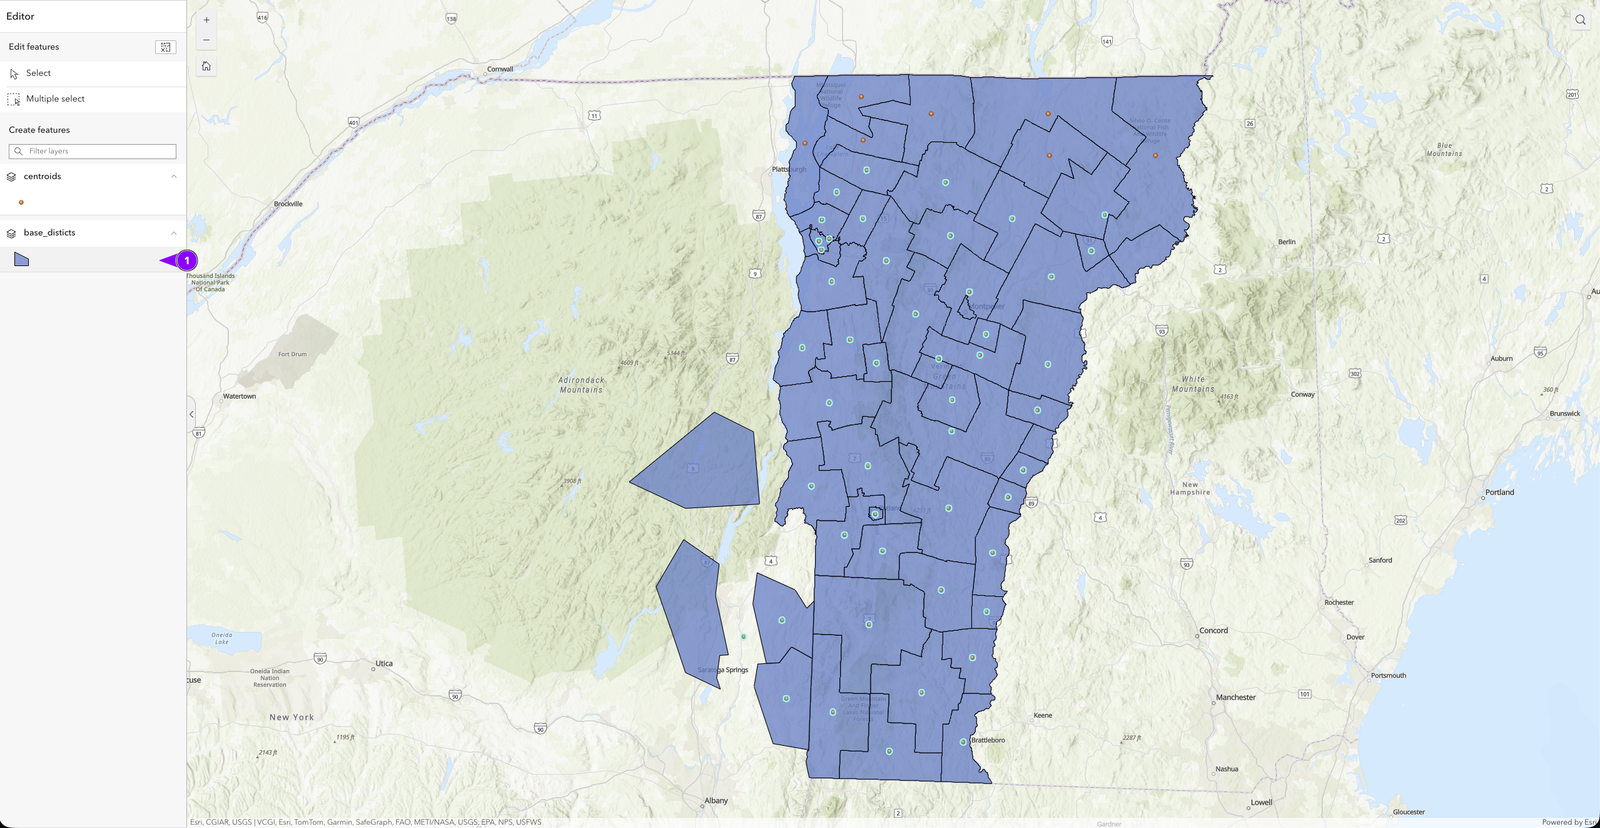
Once the layer has been selected, we can begin drawing the geometry we want.
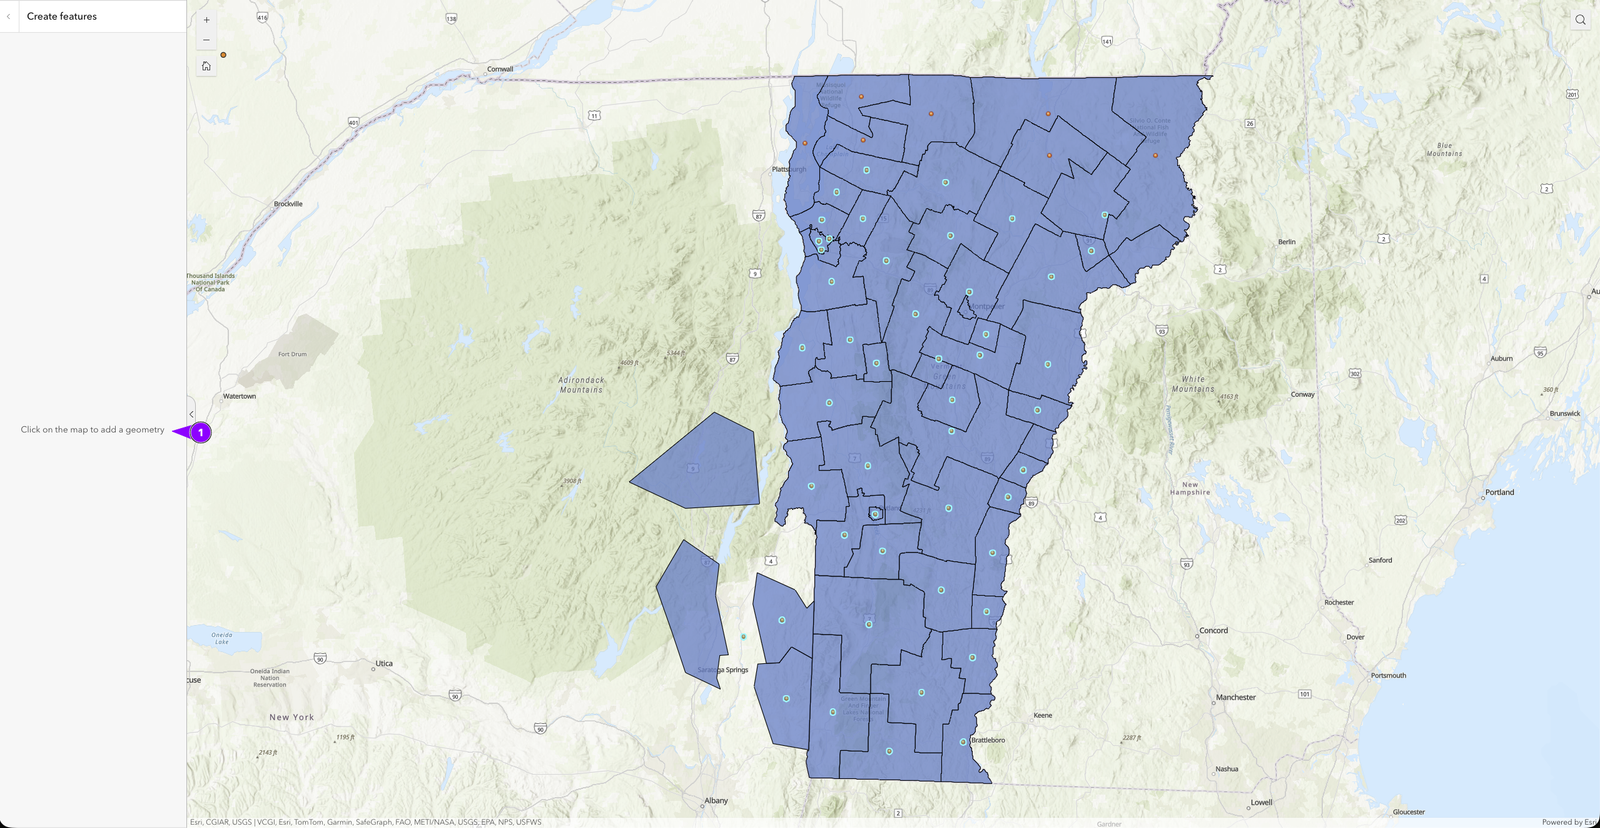
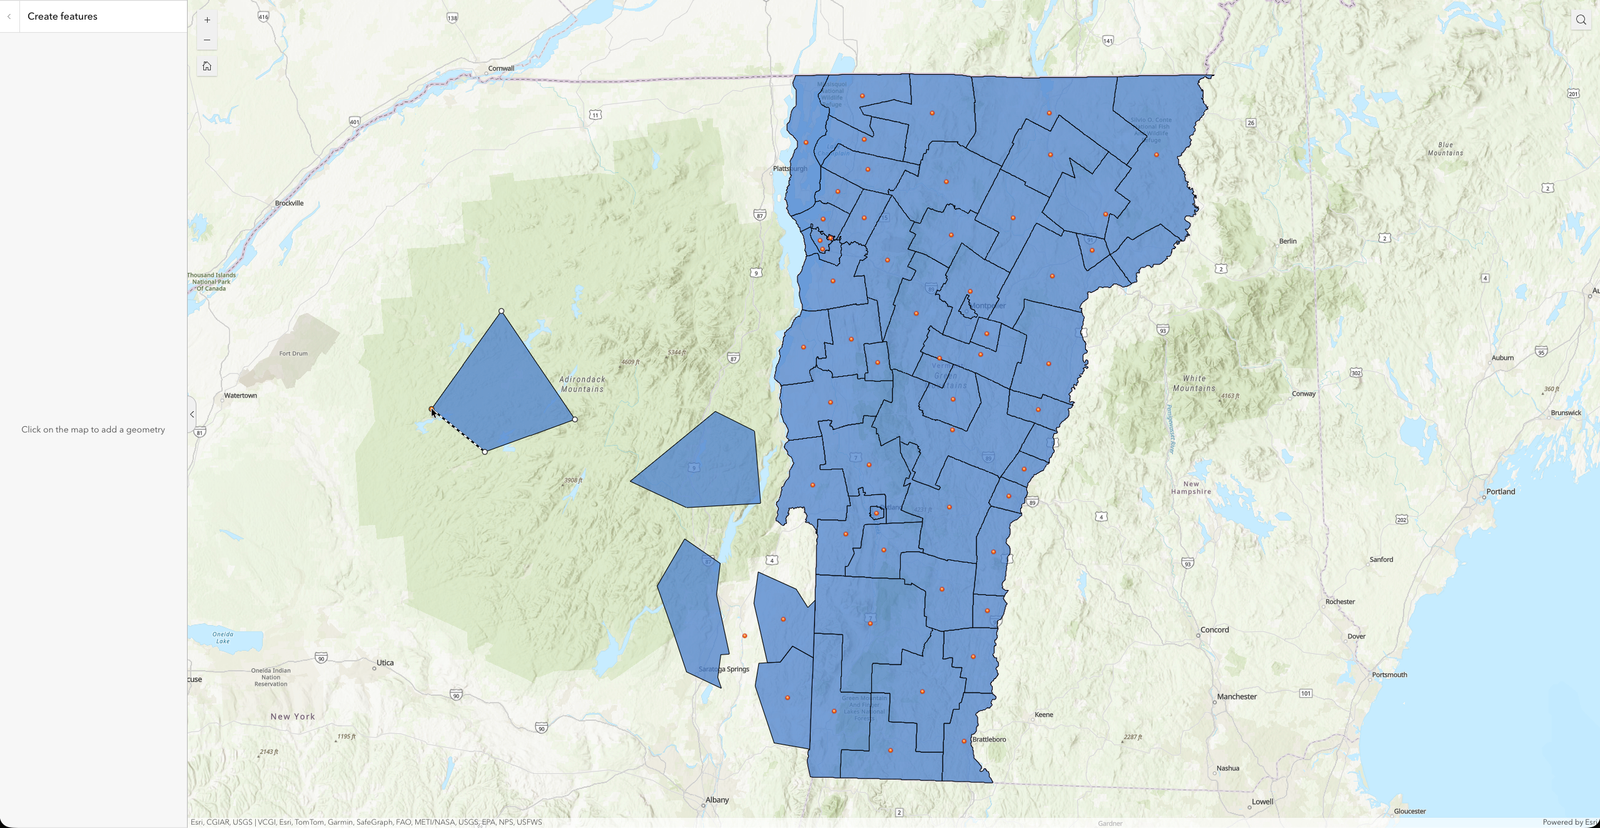
Once the geometry has been defined, it will be highlighted (1), and in the widget area, there will be a form that allows you to add properties (2). This form helps you indicate which values are required and, depending on the data type, provides the tools to select them.
Once all the data has been entered, click “Create” to save the changes.