Manual
Append Data Widget
Overview
Streamline spatial data ingestion with seamless file-to-layer integration in ArcGIS Experience Builder. The Append Data widget simplifies the process of importing external geographic information by allowing users to upload Shapefiles or CSV files directly into their web applications. By automating attribute alignment and offering flexible data sourcing, it eliminates the tedious manual overhead of data conversion, empowering users to keep their GIS layers up to date with minimal effort.
Key Features
- Multi-Format Ingestion: Direct support for importing spatial data from Shapefiles (.zip) and CSV files.
- Intelligent Attribute Matching: Smart mapping systems that automatically align incoming file attributes with existing layer fields.
- Target Layer Selection: Flexible controls that let users explicitly choose which target layer receives the imported data.
- Versatile Sourcing: Full compatibility with Portal Groups or Data Sources as native backends for your data management.
Getting Started
Installation
To install an Experience Builder widget, follow the instructions at: Arcgis: Add custom widget
Configuration
The configuration panel has three sections:
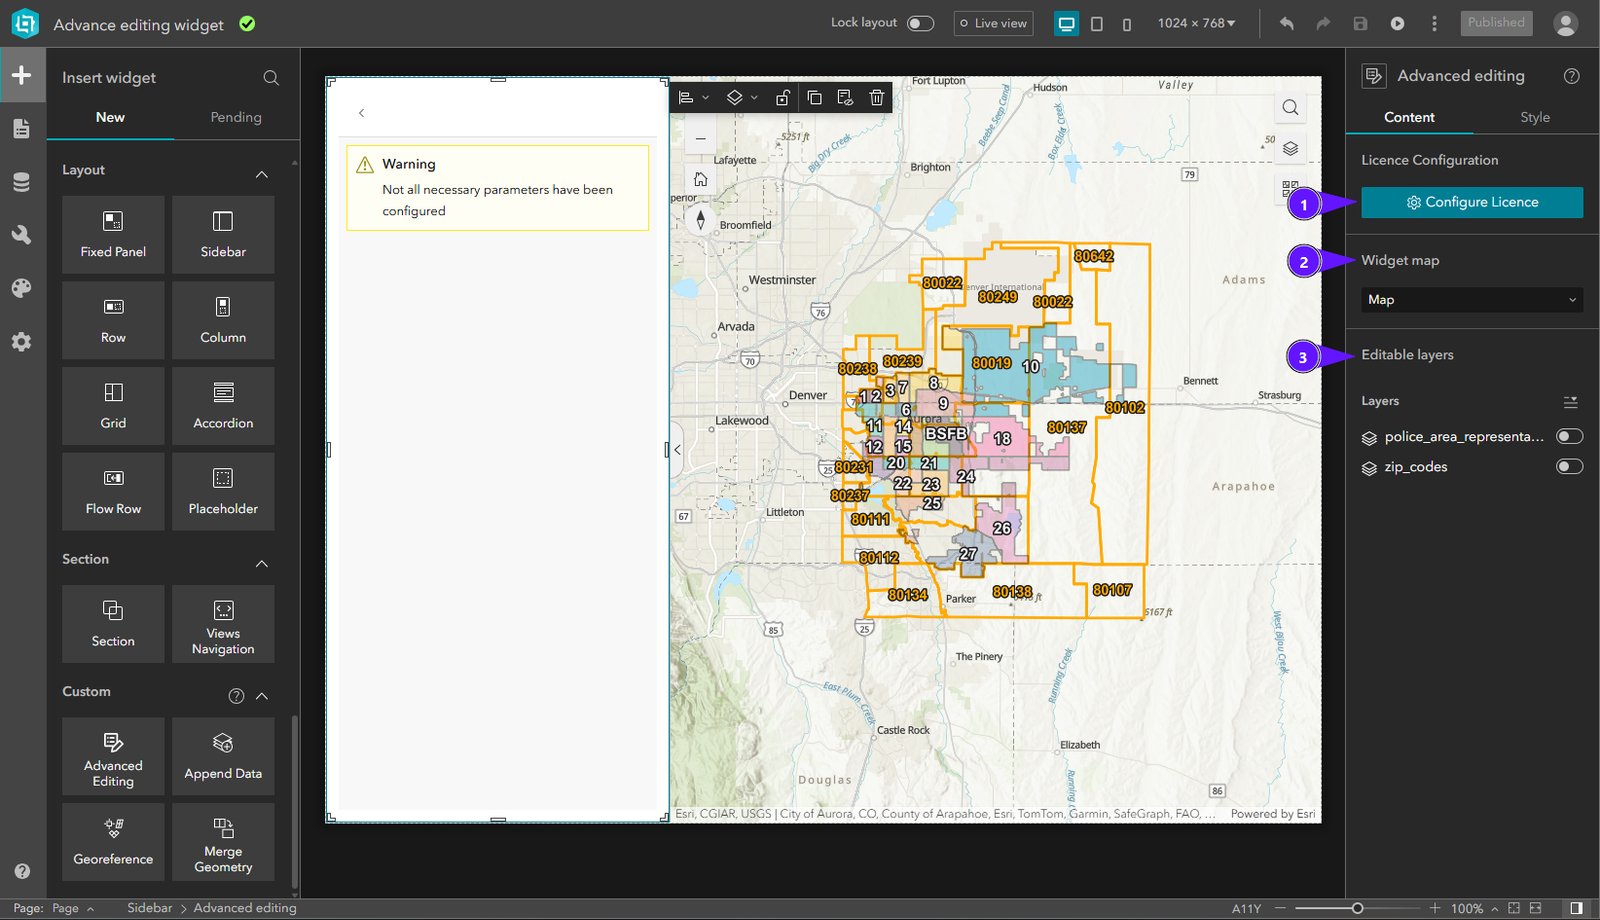
- License Configuration
- Map settings
- Layers settings
License Configuration
To activate the widget license:
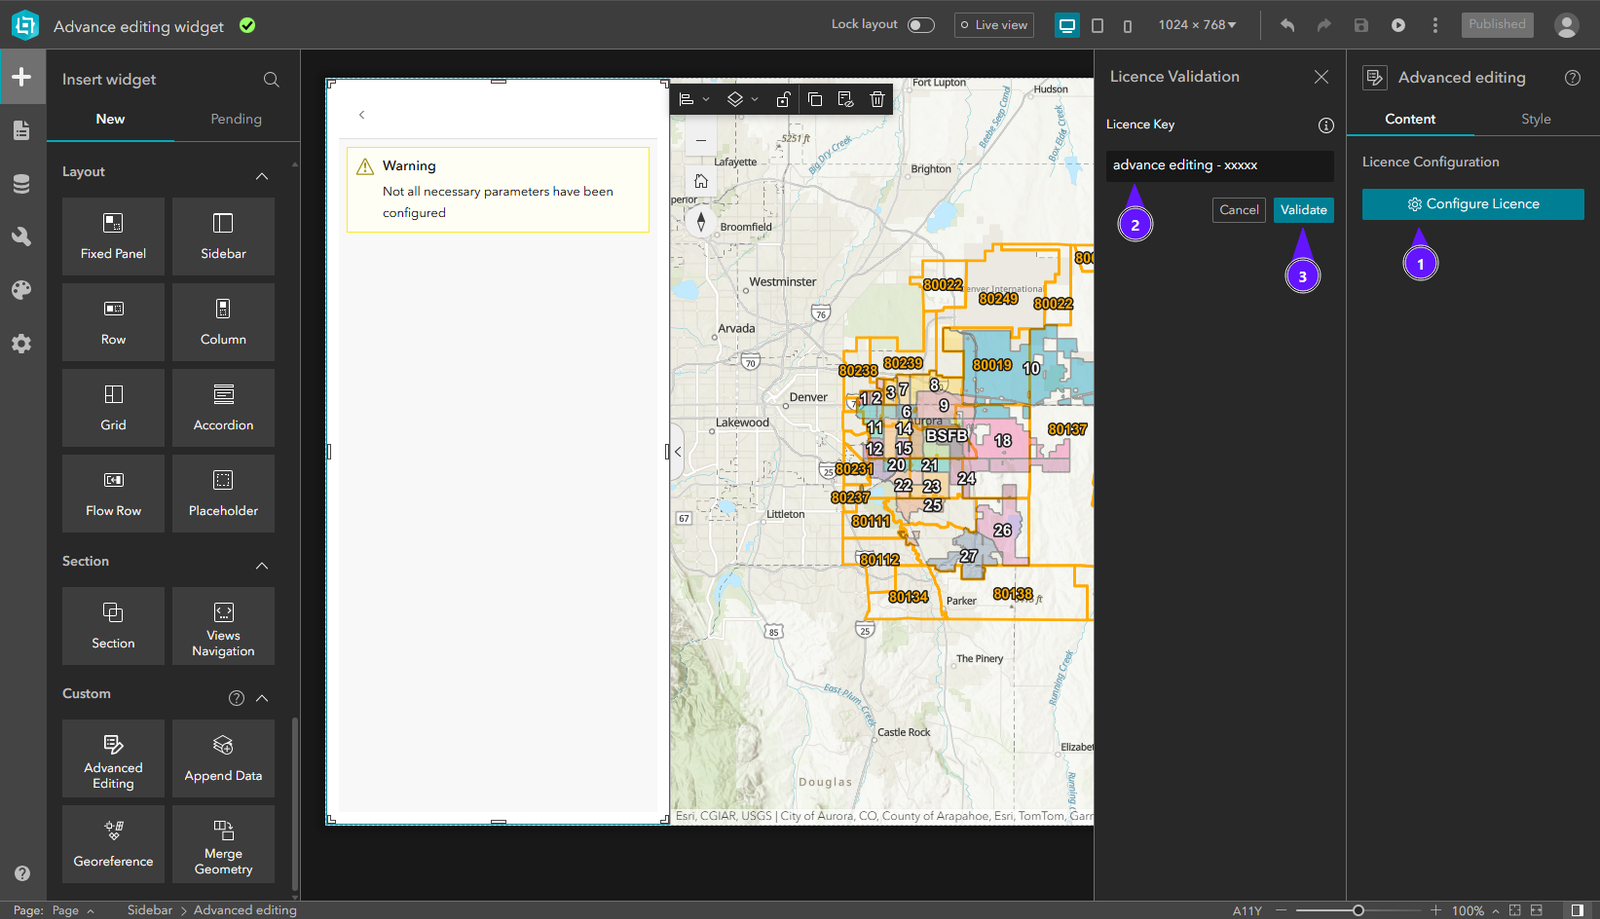
- In the right panel, click Configure Licence.
- Enter your license key in the input field.
- Click Validate.
Once validated, the widget is fully functional.
Select Map Widget
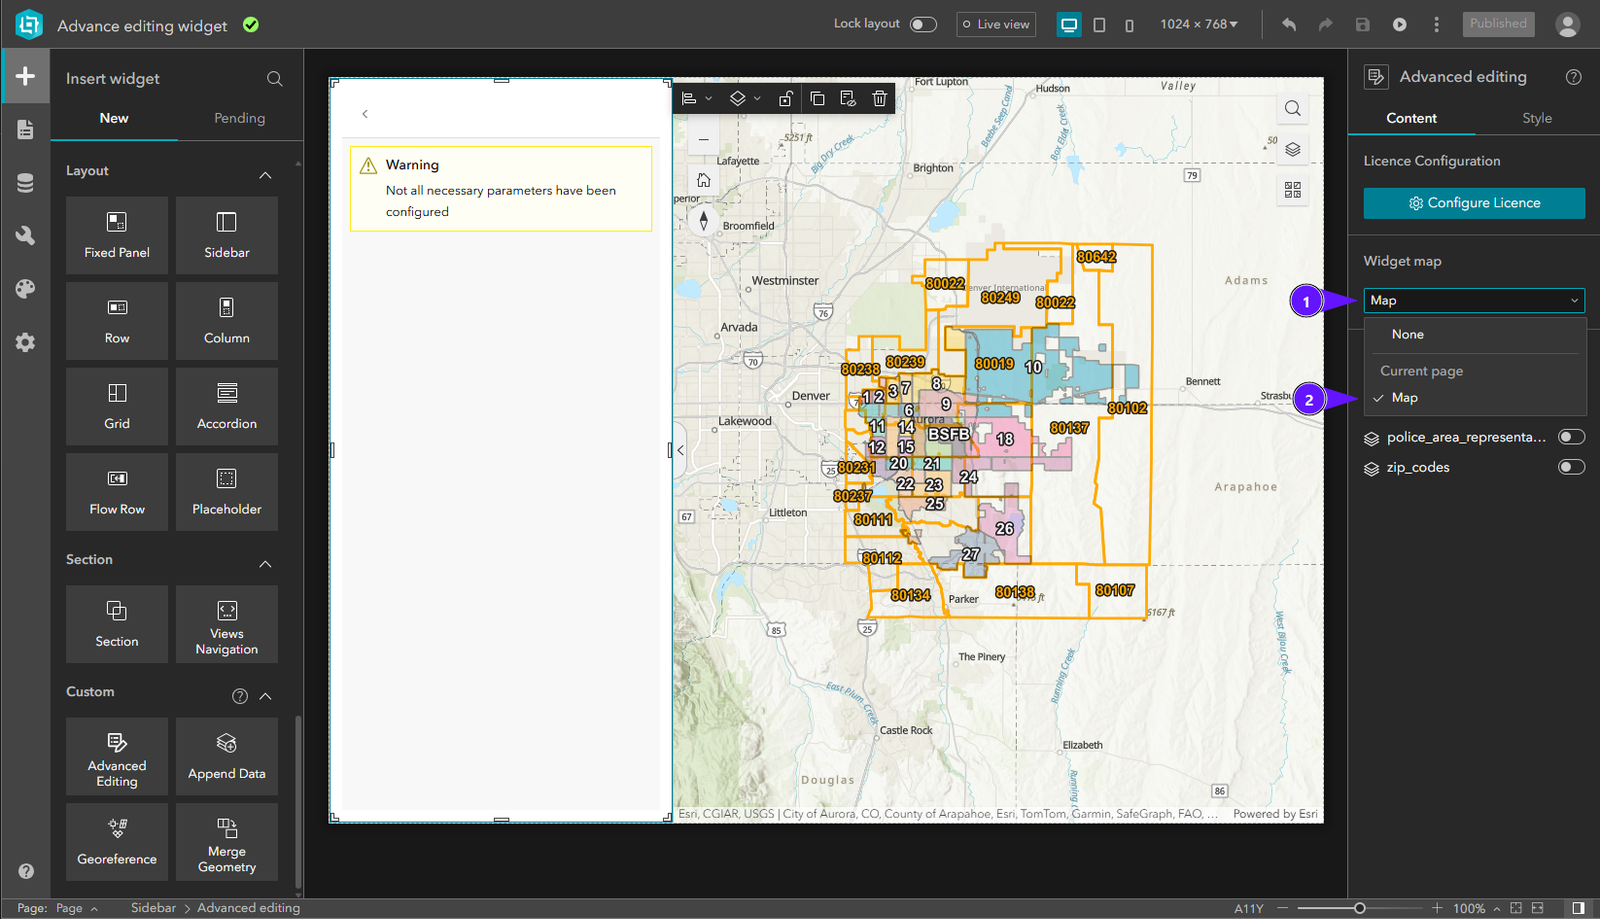
In Select Map Widget, open the dropdown (1) and choose the map (2) to use with this widget.
Select Layers
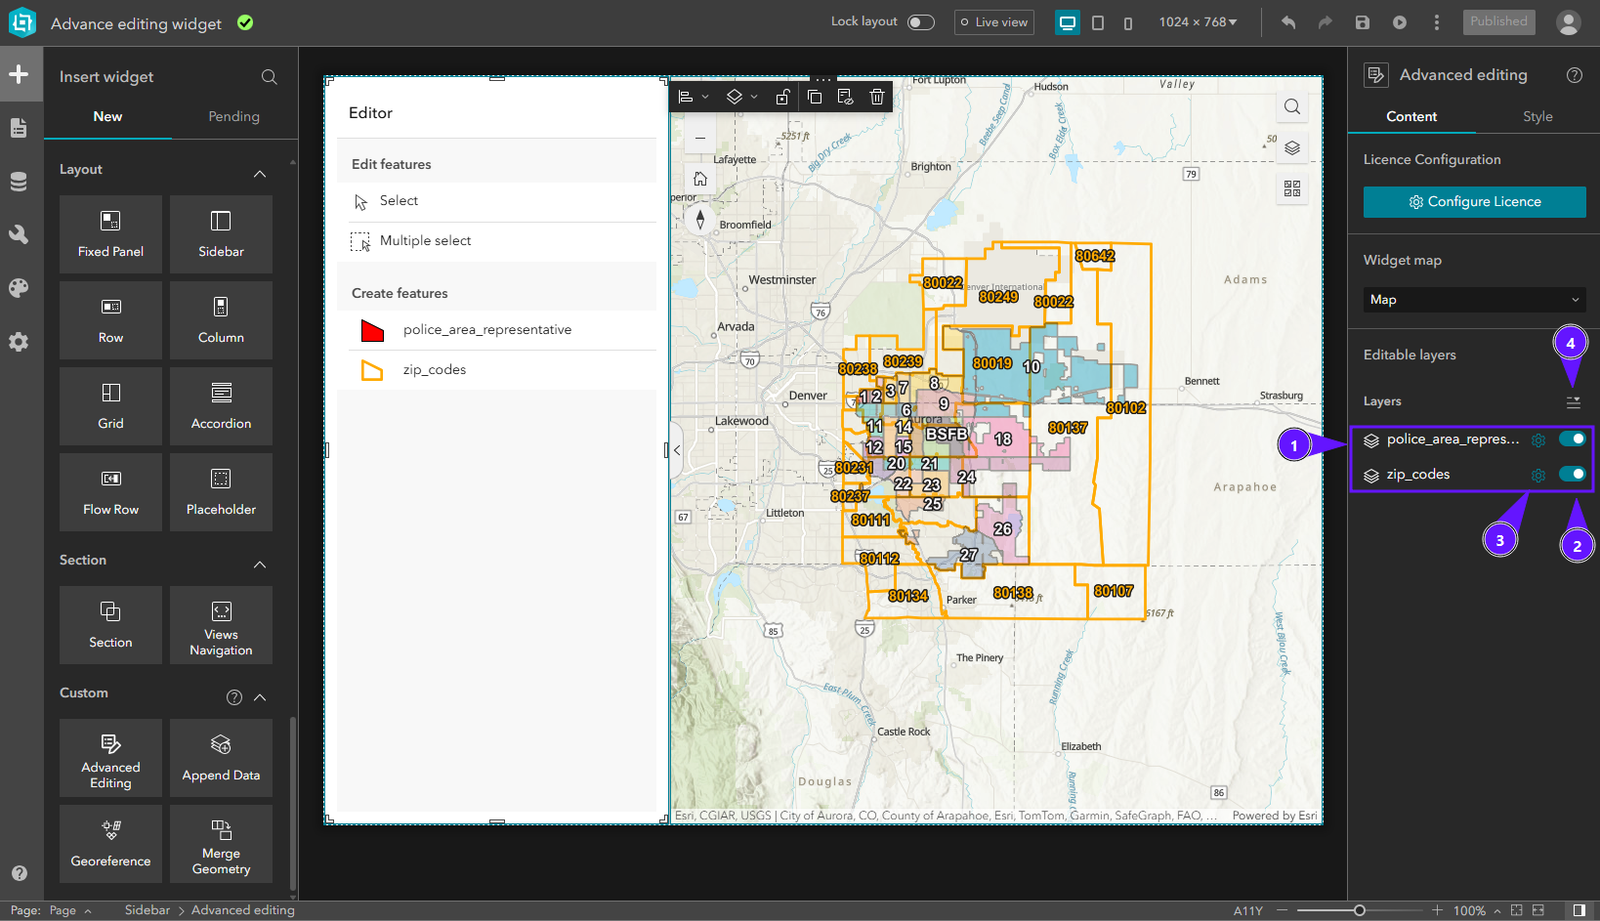
Usage
The Append Data Widget allows you to add data to the active layer from various file formats, such as CSV or shapefiles.
To do this, we first need to upload the file we wish to import.
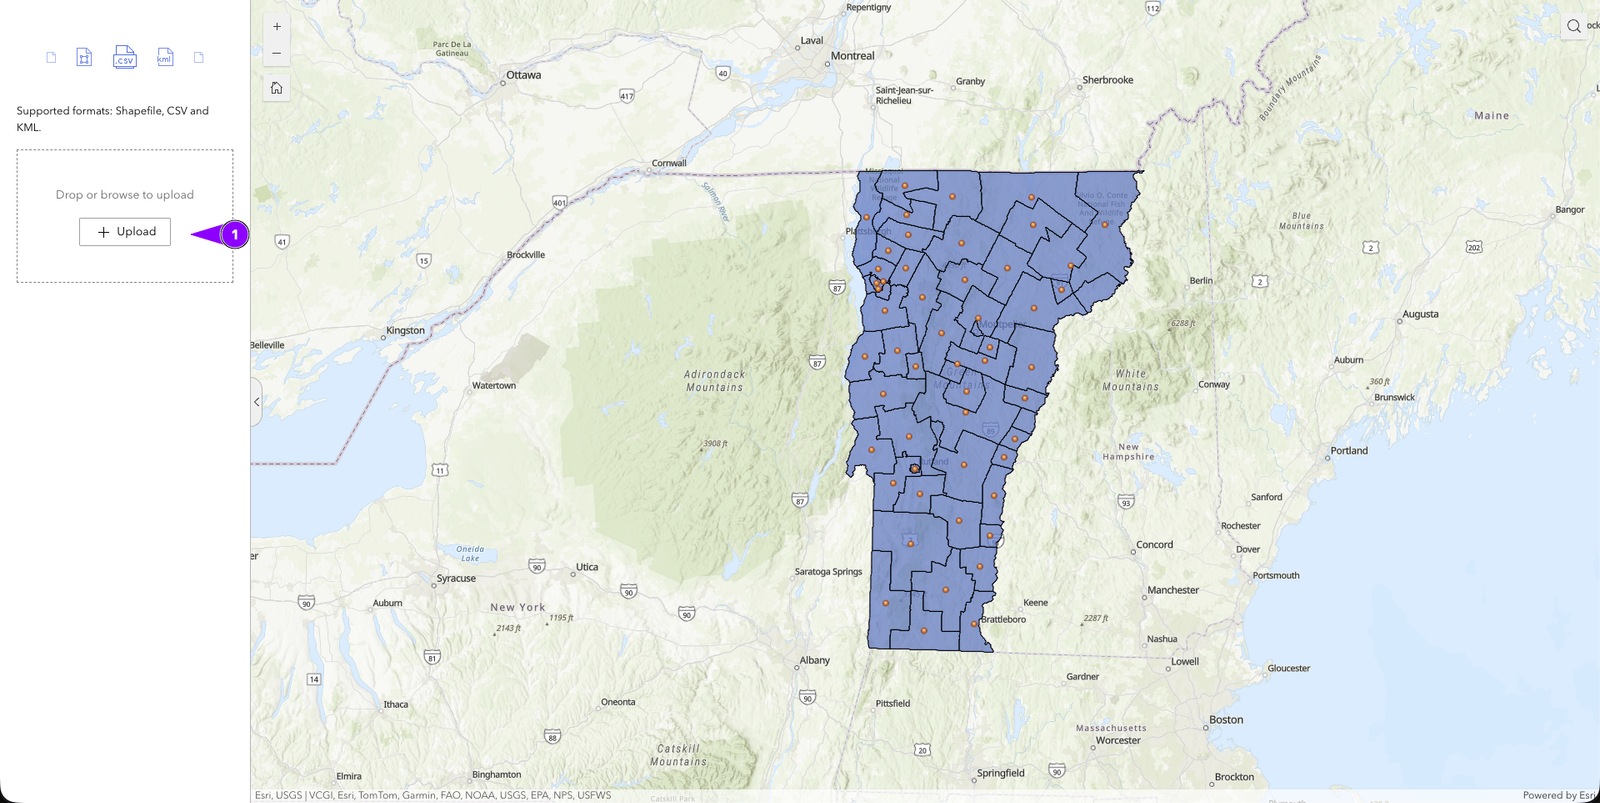
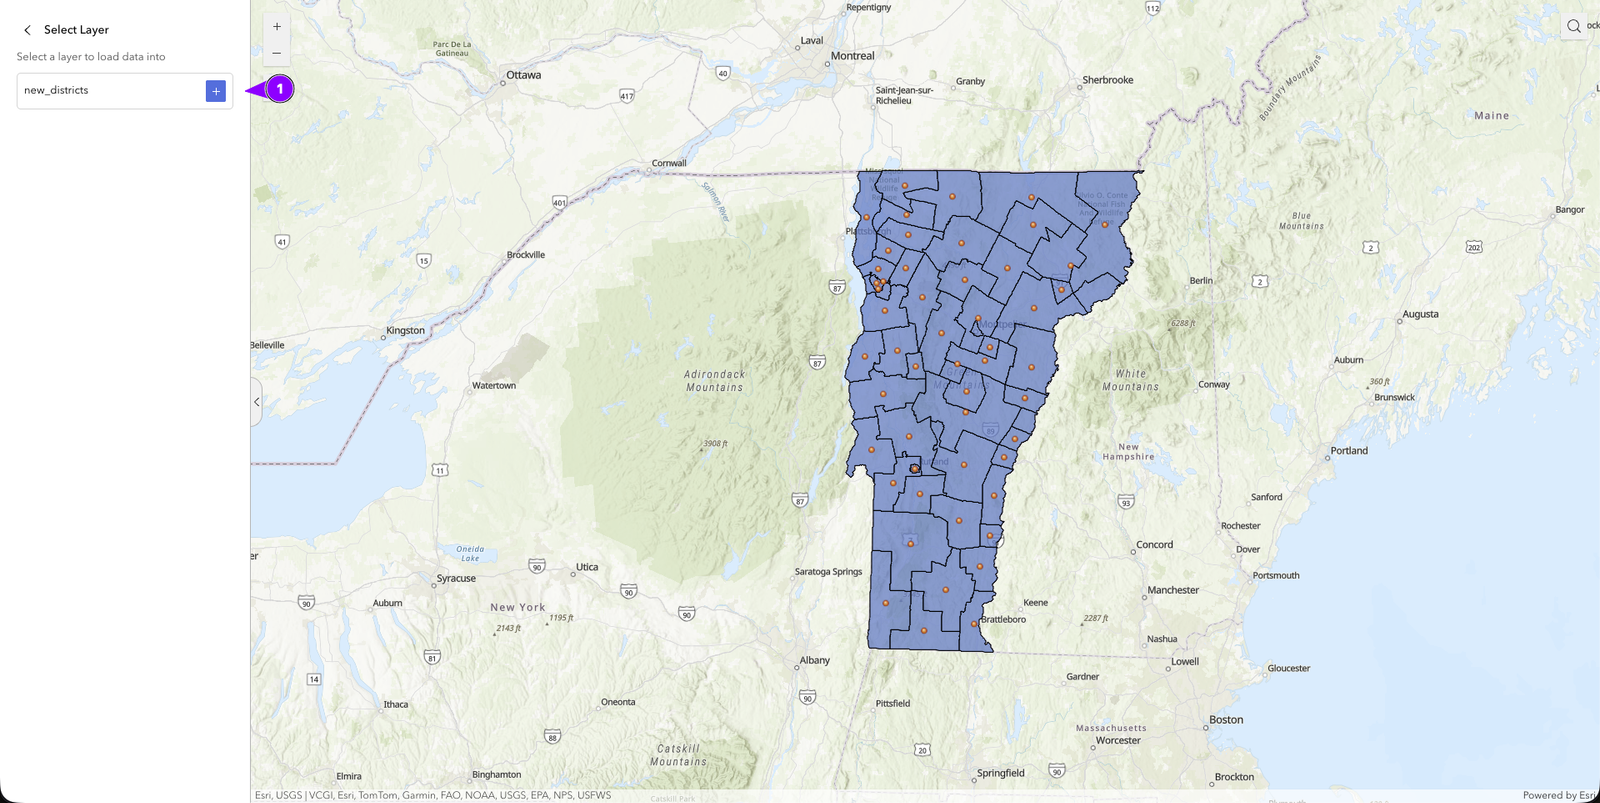
Once we import the file, we will see the name of the layer it contains; click the + sign to proceed.
Once the parameters for the file being imported have been selected, we proceed to the next screen, where we see a preview of the imported geometries (1), a panel containing a destination layer selector (2), and a form for editing attributes (3).
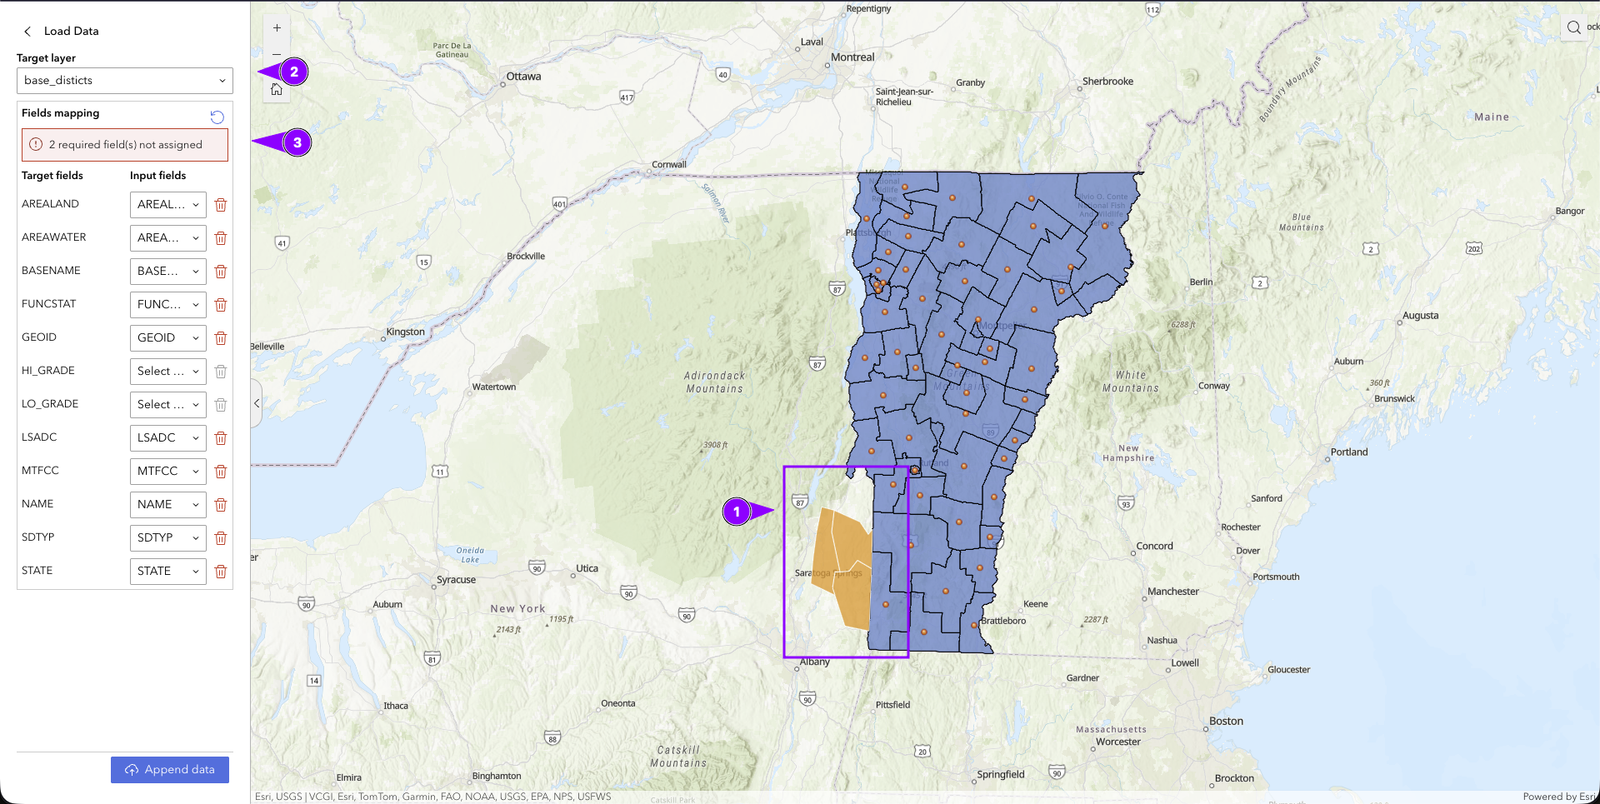
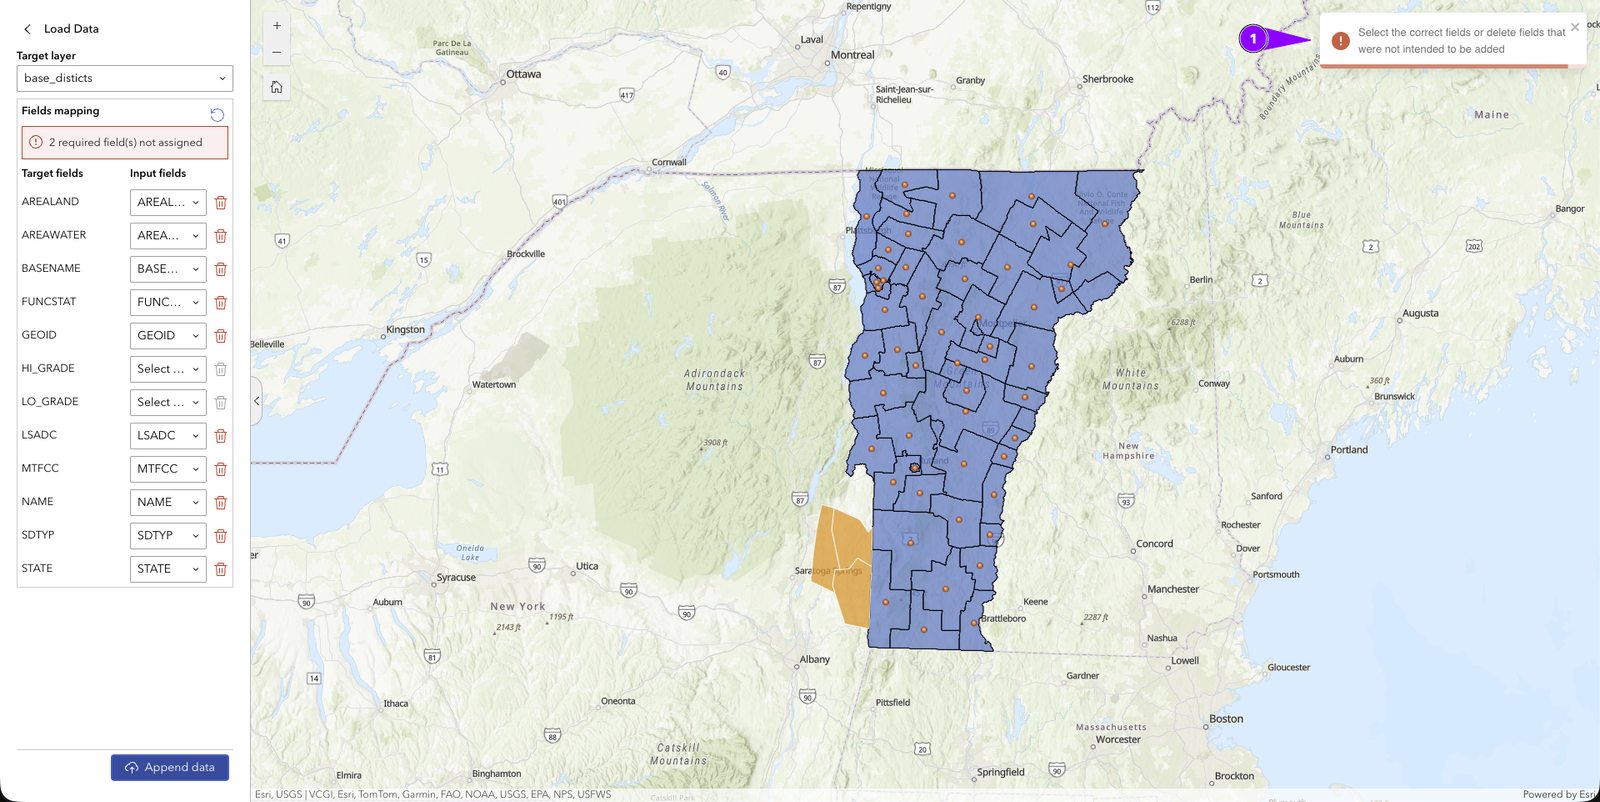
If we try to ignore the form's warnings and save without addressing them, we will see a message notifying us of issues that need to be resolved.